
Unlocking the Benefits of Vermicomposting for Your Garden
Have you ever wondered how to turn your kitchen scraps into black gold for your garden? Vermicomposting might be the sustainable solution you’ve been looking for. This natural process harnesses the power of composting worms to transform organic waste into nutrient-rich fertilizer, making it perfect for eco-friendly gardening enthusiasts across the USA.
What is Vermicomposting?
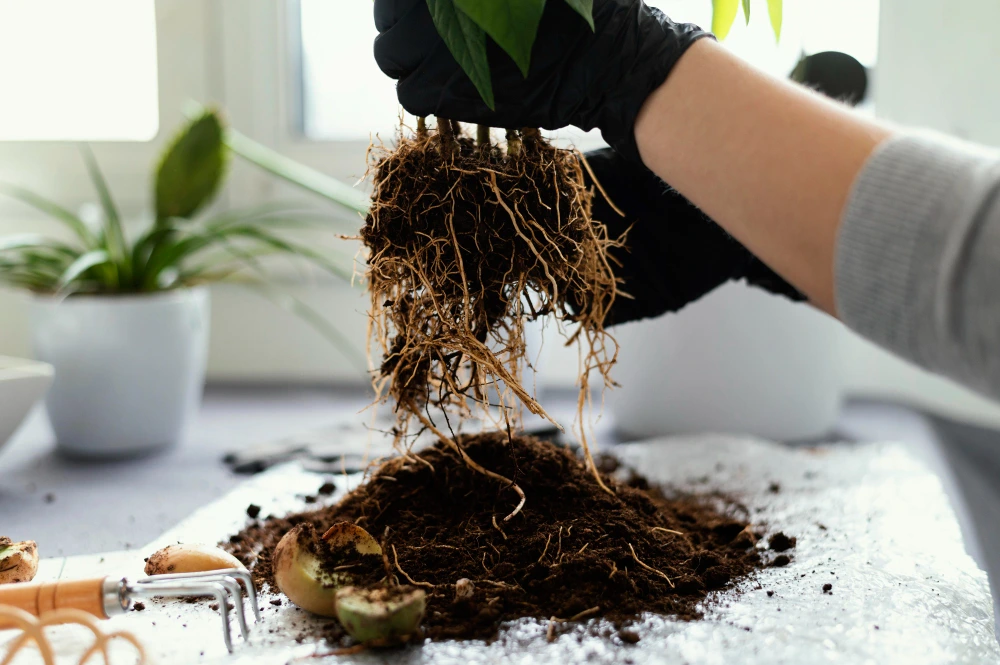
Vermicomposting is the process of using specialized worms to break down organic waste materials into high-quality compost. This technique relies on red wiggler worms (Eisenia fetida) to accelerate decomposition and produce worm castings, one of nature’s most powerful soil amendments.
This sustainable agriculture practice has gained tremendous popularity among American homeowners, especially those embracing a zero waste lifestyle. Worm composting offers a practical solution for organic waste management for residents of New York City apartments or California backyard gardens.
The Science Behind Vermiculture
Worms consume food scraps and organic matter, digest the material, and excrete it as vermicast—a dark, crumbly substance rich in beneficial microorganisms, nutrients, and enzymes. This natural plant food contains higher concentrations of nitrogen, phosphorus, and potassium than regular compost, making it an exceptional organic fertilizer for your garden.
Why Choose Vermicomposting? The Benefits Explained
Environmental Benefits
Vermicomposting reduces your carbon footprint by diverting food waste from landfills. In the USA, approximately 30-40% of the food supply goes to waste, contributing to methane emissions in landfills. By implementing a home composting solution, you’re actively participating in the circular economy and supporting regenerative gardening practices.
Garden and Soil Health Improvement
The worm castings produced through vermicomposting offer remarkable benefits for your plants:
- Enhanced nutrient availability: Worm castings contain nutrients in forms that plants can readily absorb
- Improved soil structure: The organic matter helps sandy soils retain moisture and clay soils drain better
- Beneficial microorganisms: Introduces helpful bacteria and fungi that support plant health
- Natural pest resistance: Plants grown with vermicompost often show increased resistance to pests and diseases
Economic Advantages
Creating your own organic fertilizer saves money on commercial soil amendments and reduces waste disposal costs. For urban gardeners practicing small space gardening, vermicomposting provides a continuous supply of premium compost without the need for expensive store-bought alternatives.

Getting Started: Vermicomposting for Beginners
Choosing the Right Vermicomposting Worms
Red wiggler worms (Eisenia fetida) are the gold standard for vermicomposting in the USA. These composting worms thrive in temperatures between 55-77°F, making them suitable for most American climates.
Other suitable species include:
- European nightcrawlers (Eisenia hortensis)
- African nightcrawlers (Eudrilus eugeniae) – best for warmer southern states
Setting Up Your Worm Vermicomposting Bin
Selecting the Right Container
Your worm farm setup can be as simple or elaborate as you prefer. Popular options include:
- Commercial worm bins: Pre-made systems with multiple trays for easy harvesting
- DIY plastic storage bins: Cost-effective option using 10-15 gallon opaque containers
- Wooden boxes: Breathable option for outdoor or garage placement
- Apartment composting systems: Compact, odor-controlled designs perfect for indoor use
Essential Components for Your Worm Bin
A successful vermicomposting container needs:
- Proper aeration system: Drill 8-12 small holes (1/8 inch) on sides and bottom for airflow
- Drainage: Holes in the bottom with a collection tray for excess moisture
- Bedding materials: Shredded newspaper, cardboard, coconut coir, or dried leaves
- Dark environment: Worms prefer darkness, so keep the bin covered
- Moisture retention: Bedding should feel like a wrung-out sponge
Creating the Perfect Bedding
Start with 3-4 inches of moist bedding material. Good bedding options include:
- Shredded newspaper (avoid glossy paper)
- Cardboard torn into strips
- Coconut coir (readily available in the USA)
- Dried leaves
- Peat moss (though coconut coir is more sustainable)
What to Feed Your Worms: Kitchen Waste Recycling Guide
Best Foods for Vermicomposting
Your worms will happily consume most food scrap composting materials:
Vegetables and fruits: Peels, cores, scraps, and overripe produce Grains: Bread, pasta, rice, oatmeal, cereal Coffee and tea: Grounds and bags (remove staples) Eggshells: Crushed for easier consumption and calcium supplementation Paper products: Non-glossy paper, napkins, paper towels
Foods to Avoid
Certain materials can create problems in your layered composting system:
- Meat, fish, and bones (attract pests)
- Dairy products (create odor issues)
- Oily or greasy foods
- Citrus in large quantities (too acidic)
- Onions and garlic in excess
- Pet waste
- Treated wood or glossy paper
Feeding Best Practices
For optimal bin composting results, bury food scraps under the bedding rather than leaving them on top. This natural approach to pest management worms helps prevent fruit flies and odors. Feed your worms 2-3 times per week, adding only what they can consume within a few days.
Maintaining Your Worm Bin: Temperature, Moisture, and More
Temperature Regulation
Worms thrive in moderate temperatures. In the USA, indoor composting works year-round. Outdoor bins may require protection.
- Summer: Keep bins in shade; add extra bedding if temperatures exceed 85°F
- Winter: Move bins indoors or insulate with straw in regions below 50°F
- Ideal range: 55-77°F for maximum worm activity
Moisture Balance
Proper moisture is crucial for successful vermiculture techniques. Your bin should maintain dampness similar to a wrung-out sponge:
- Too dry: Spray with water and add fresh food scraps
- Too wet: Add dry bedding materials and improve aeration
- Just right: Bedding clumps when squeezed but doesn’t drip
Worm Bin Maintenance Schedule
Weekly tasks:
- Check moisture levels
- Bury food scraps in different sections
- Monitor for pests or odors
Monthly tasks:
- Fluff bedding to improve aeration
- Check population health
- Add fresh bedding if needed
Quarterly tasks:
- Harvest finished vermicast production
- Divide worm population if bin is crowded
Troubleshooting Vermicomposting: Common Problems and Solutions
Odor Control Vermicomposting
A healthy worm bin should smell earthy, like forest soil. Bad odors indicate problems:
Problem: Rotten or ammonia smell Solution: You’re overfeeding. Stop adding food for a week, add dry bedding, and improve aeration.
Problem: Sour smell Solution: Too acidic. Add crushed eggshells and reduce citrus and acidic foods.
Pest Management
Fruit flies: Bury all food scraps completely, add a layer of dry bedding on top, and ensure proper moisture levels.
Mites: Usually harmless but indicate overly wet conditions. Add dry bedding and reduce moisture.
Ants: Sign of too-dry conditions. Increase moisture and create a water barrier around the bin’s feet.
Worm Health Issues
Worms escaping: Usually means unsuitable conditions—check moisture, temperature, pH levels, and overfeeding.
Worm die-off: Test for toxic substances, extreme temperatures, or pH imbalances. Start fresh if necessary.

Harvesting Your Black Gold Compost
When to Harvest Worm Castings
Your vermicast is ready when the bedding transforms into dark, crumbly material, typically after 3–6 months. Signs of readiness include:
- Most bedding has disappeared
- Material looks uniform and dark
- Original food scraps are no longer recognizable
Harvesting Methods
The Migration Method
- Push finished compost to one side of the bin
- Add fresh bedding and food to the empty side
- Wait 2-3 weeks as worms migrate to the new side
- Remove the finished compost from the original side
The Light Method
- Dump bin contents onto a tarp under bright light
- Worms burrow downward to escape light
- Remove top layers of compost
- Wait for worms to burrow again
- Repeat until only worms remain
The Screen Method
Use 1/4 inch hardware cloth to sift compost. Worms and large particles stay on top, while finished castings fall through.
Using Vermicomposting in Your Organic Gardening
Application Methods
Direct soil amendment: Mix 25% worm castings with 75% potting soil for containers, or work into garden beds at 1/4 to 1/2 inch depth.
Top dressing: Sprinkle around established plants and gently work into the top inch of soil.
Seed starting: Blend 1 part castings with 3 parts potting mix for nutrient-rich seedling growth.
Compost tea: Steep castings in water (1 cup per gallon) for 24 hours to create liquid fertilizer.
Results You Can Expect
Gardens amended with vermicompost typically show:
- Stronger, healthier plant growth
- Improved disease resistance
- Better moisture retention in soil
- Increased yields in vegetable gardens
- Enhanced flavor in herbs and vegetables
Vermicomposting for Different Living Situations
Apartment Composting Solutions
Urban dwellers can successfully practice indoor composting with compact systems designed for small space gardening. Stackable tray systems fit under kitchen sinks or in closets and, when properly maintained, produce no odor.
Backyard Worm Farming
Larger outdoor systems can handle more kitchen waste recycling and produce greater quantities of organic fertilizer. Consider multiple bins or continuous flow systems for households generating substantial food scraps.
Community Vermicomposting
Some American communities have established shared vermicomposting programs, allowing neighbors to collectively manage organic waste and share the resulting compost for local gardens and green spaces.
Scaling Up: From Hobby to Production
Commercial Vermicomposting Considerations
For those interested in turning worm composting into a small business:
- Market demand: Local organic farmers and nurseries need quality vermicast
- Regulations: Check local and state requirements for composting operations
- Infrastructure: Commercial systems require climate-controlled facilities
- Worm production: Breeding worms can become a secondary income stream
Educational Opportunities
Schools across the USA are implementing vermicomposting programs to teach students about sustainable agriculture, the circular economy, and soil health improvement. These hands-on projects support STEM education goals and promote environmental stewardship.
Seasonal Considerations for USA Climate Zones
Northeast and Midwest
Winter temperatures require indoor composting or well-insulated outdoor bins. Place bins in a basement or garage and provide supplemental heat if needed.
South and Southeast
Hot, humid summers may stress worms. Provide shade, extra bedding for insulation, and monitor moisture carefully. This climate is ideal for African nightcrawlers.
West Coast
Moderate temperatures support year-round outdoor vermicomposting. Adjust for microclimates and drought conditions by monitoring moisture levels.
Southwest
Extreme heat requires indoor systems or heavily shaded, insulated outdoor bins. Desert gardeners benefit enormously from vermicompost’s moisture retention properties.
Environmental Impact: Your Contribution to Sustainability
By practicing vermicomposting, you’re contributing to significant environmental benefits:
Waste reduction: The average American household can divert 200-300 pounds of food waste from landfills annually through kitchen waste recycling.
Carbon sequestration: Vermicompost helps soil store carbon, reducing atmospheric CO2.
Water conservation: Improved soil structure reduces irrigation needs—critical in drought-prone regions.
Reduced chemical use: Natural plant food eliminates the need for synthetic fertilizers that contribute to water pollution.
Conclusion: Start Your Vermicomposting Journey Today
Vermicomposting offers an accessible, effective solution for transforming kitchen scraps into nutrient-rich fertilizer and supporting a zero waste lifestyle. Worm composting delivers tangible results for those passionate about organic gardening, interested in sustainable agriculture, or looking for ways to reduce their environmental impact.
The process is forgiving for beginners, requires minimal space and investment, and provides continuous benefits for your garden and the environment. By starting your own worm bin today, you’ll join thousands of Americans who are discovering that the secret to exceptional soil health improvement might just be hiding in a humble worm’s digestive system.
Remember, successful vermicomposting is a journey, not a destination. Start small, learn from your worms, and watch as your garden thrives with the black gold you’ve created.