• Home
  • Gardening
  • About Us
  • Contact Us
organigardening.com
Gardening

Parable of Sowing Seeds

July 22, 2025 0 comments
Gardening

Seed Sowing Equipment

July 22, 2025 0 comments
Gardening

Sowing Seeds

July 22, 2025 0 comments
Gardening

Spinach Plant Spacing

July 22, 2025 0 comments
Gardening

Zucchini Plant Spacing

July 21, 2025 0 comments
Gardening

Onion Plant Spacing

July 21, 2025 0 comments

Subscribe my Newsletter for new blog posts, tips & new photos. Let's stay updated!

parable of sowing seeds
Gardening

Parable of Sowing Seeds

by aneeqrauf01@gmail.com July 22, 2025
written by aneeqrauf01@gmail.com

Parable of Sowing Seeds

The parable of sowing seeds—a timeless teaching from Jesus—is more than just a religious story. It’s a powerful metaphor for how truth is received, how growth happens in both the spiritual and natural world, and how every moment offers the opportunity to plant something meaningful. Whether you’re cultivating a garden or nurturing a relationship with God, the principles in this parable apply deeply and practically.

This guide offers an in-depth exploration of the parable, its biblical meaning, and its real-life applications. We’ll also connect it to organic gardening, offering reflections that blend faith, nature, and personal growth for a USA-based audience.


The Biblical Foundation: What Is the Parable of Sowing Seeds?

The parable of the sower appears in three Gospels: Matthew 13, Mark 4, and Luke 8. In this parable, Jesus compares the Word of God to seeds being sown on various types of ground.


Jesus Tells the Parable of Sowing Seeds

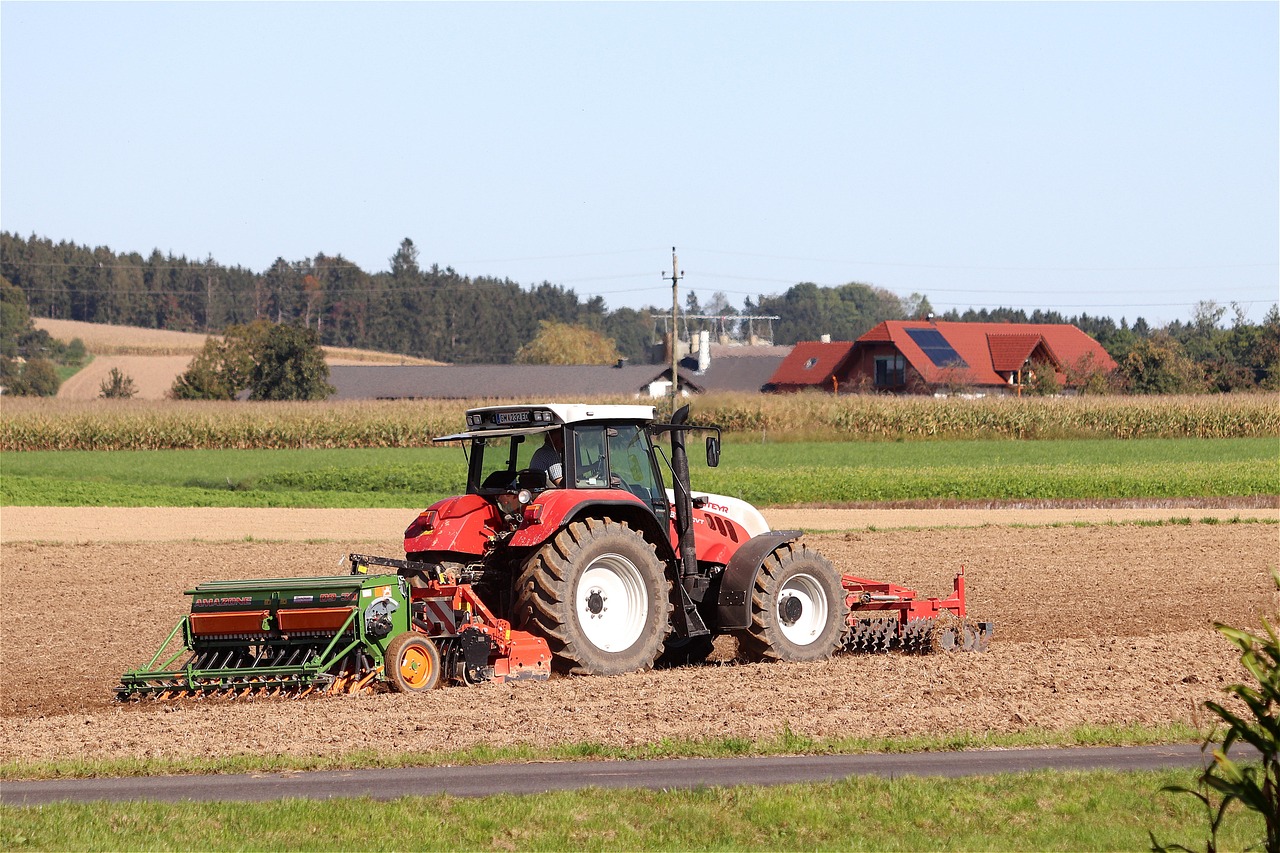
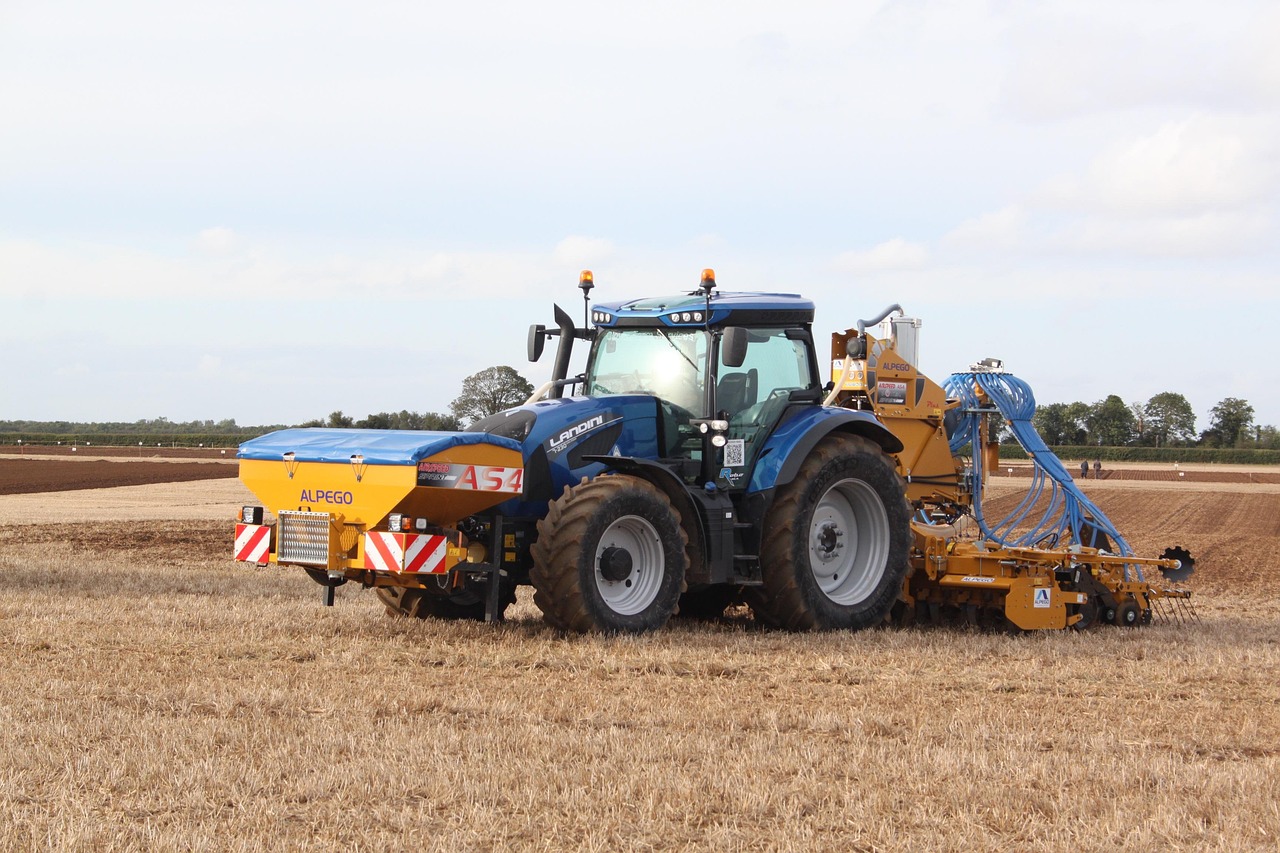
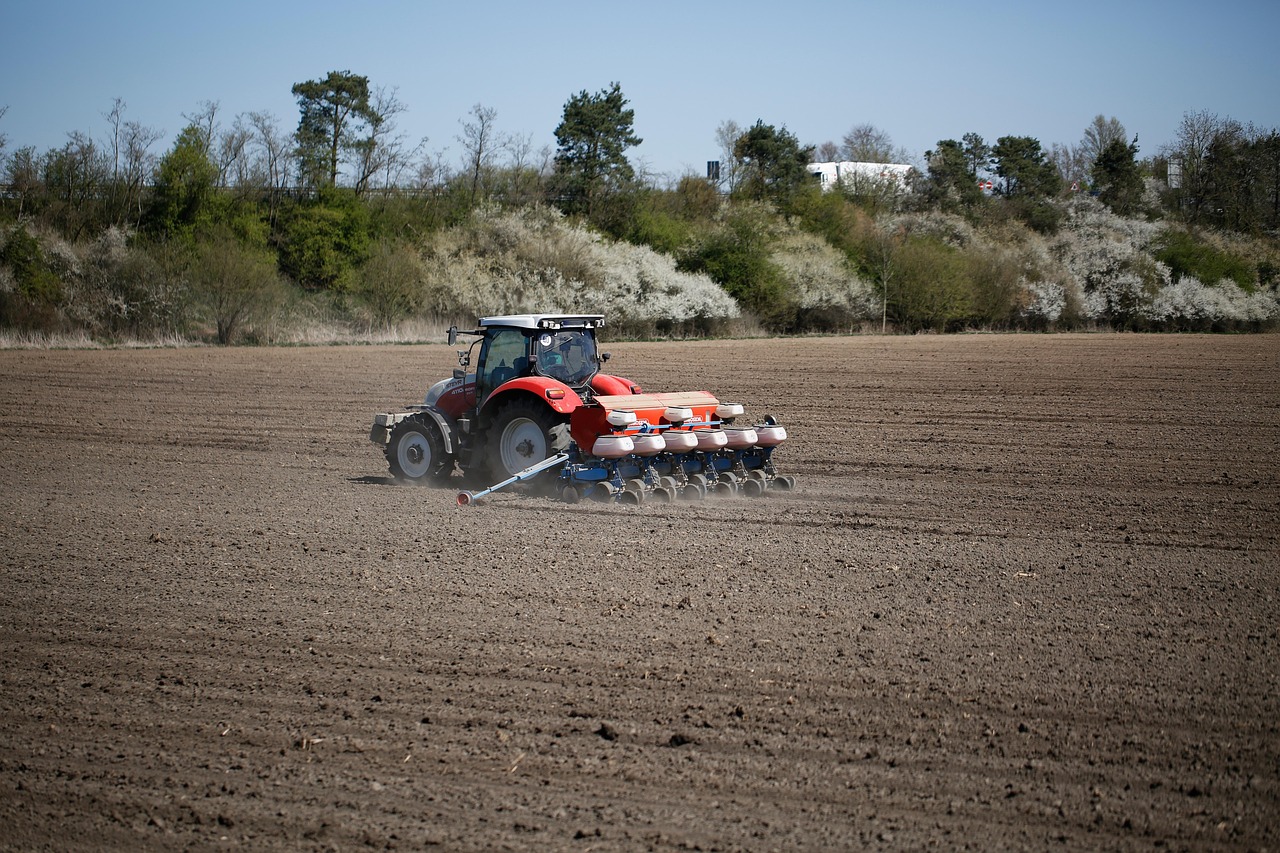
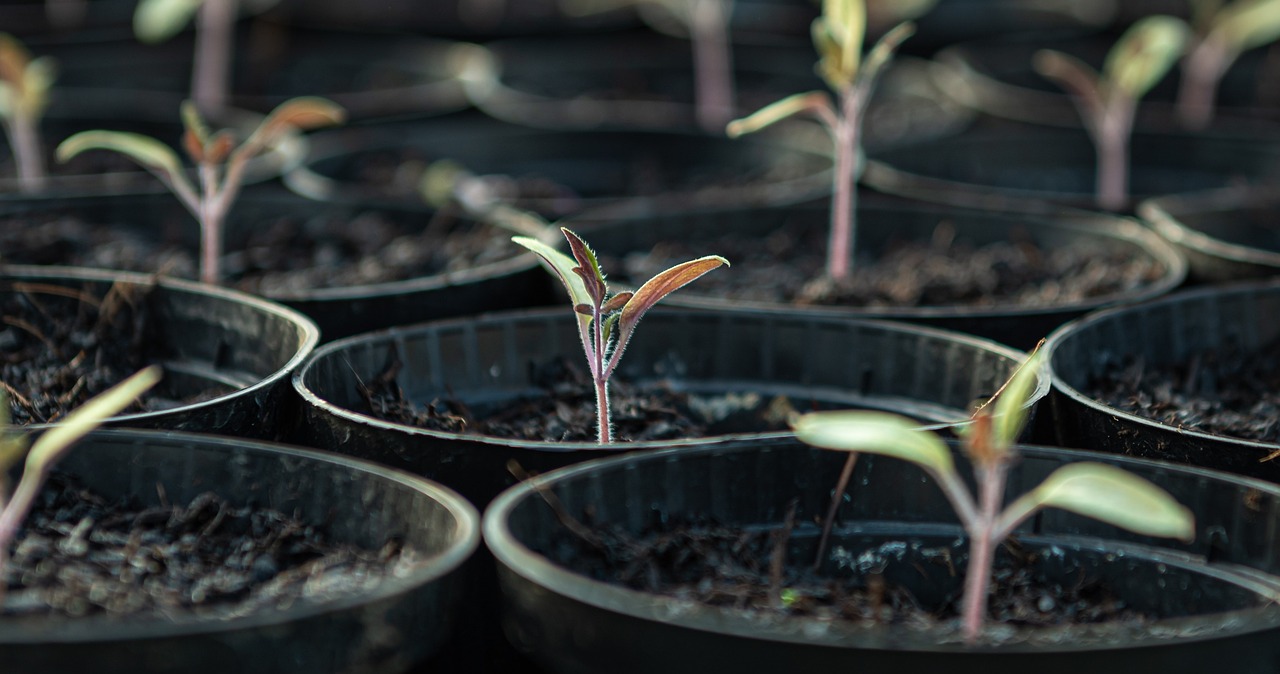
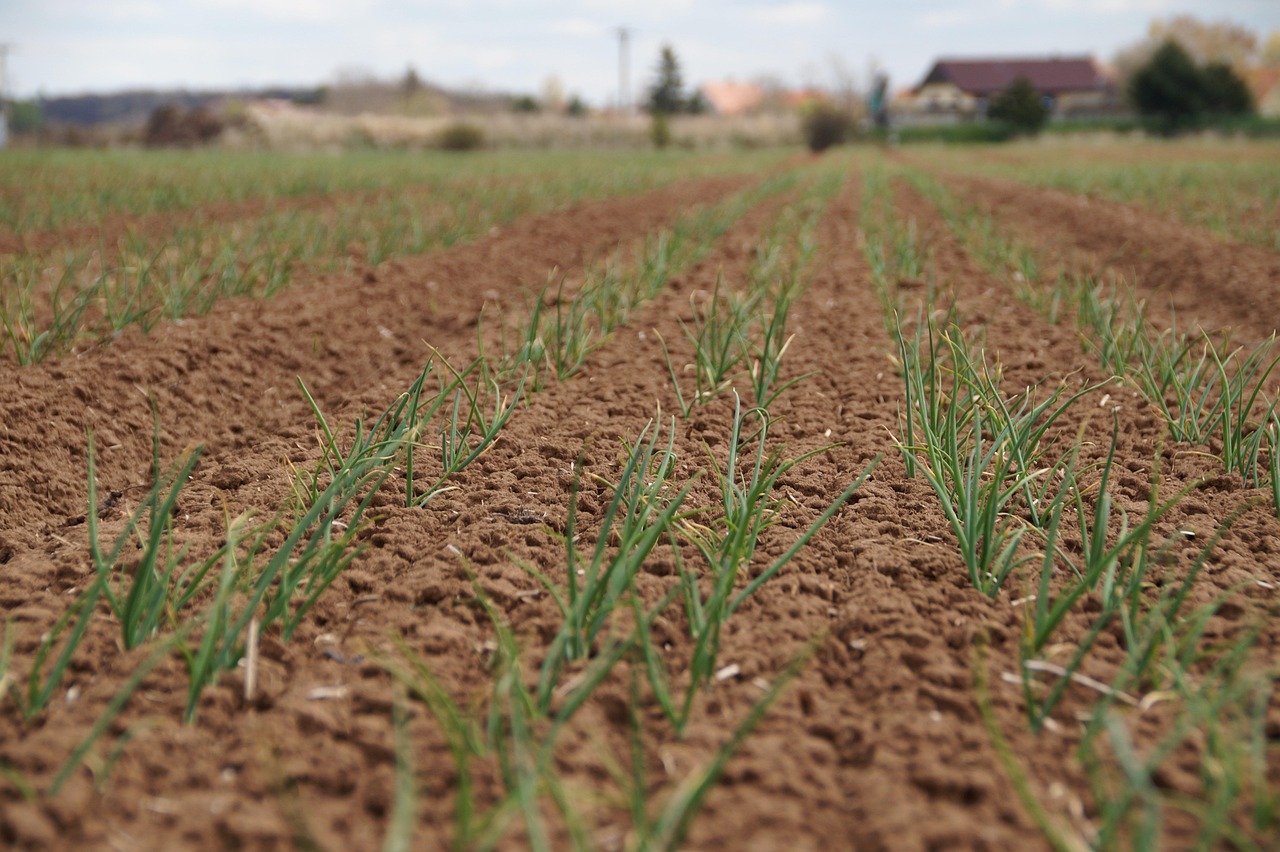
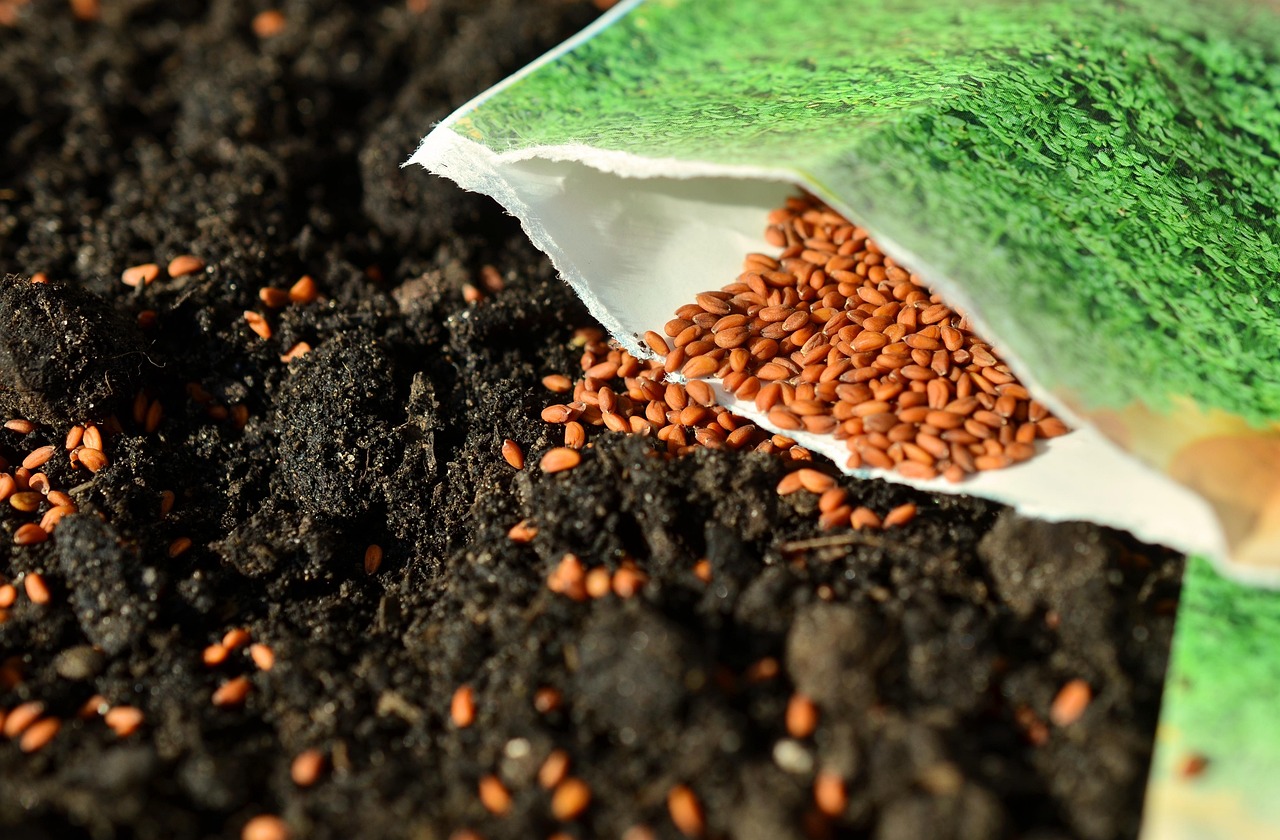
A farmer goes out to sow seed. As he scatters it, some falls on:

  • The path, where birds eat it up.
  • Rocky ground, where it springs up quickly but withers.
  • Among thorns, where it is choked.
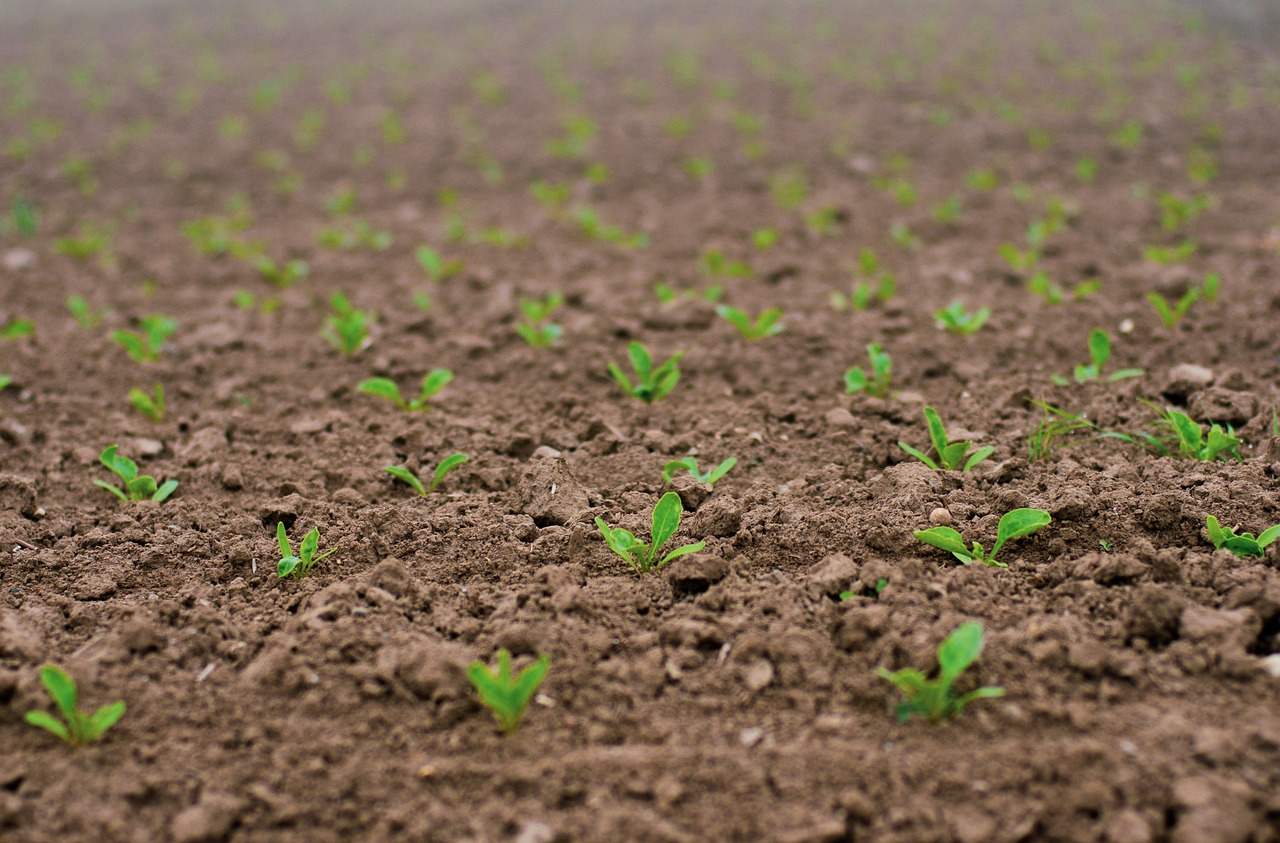
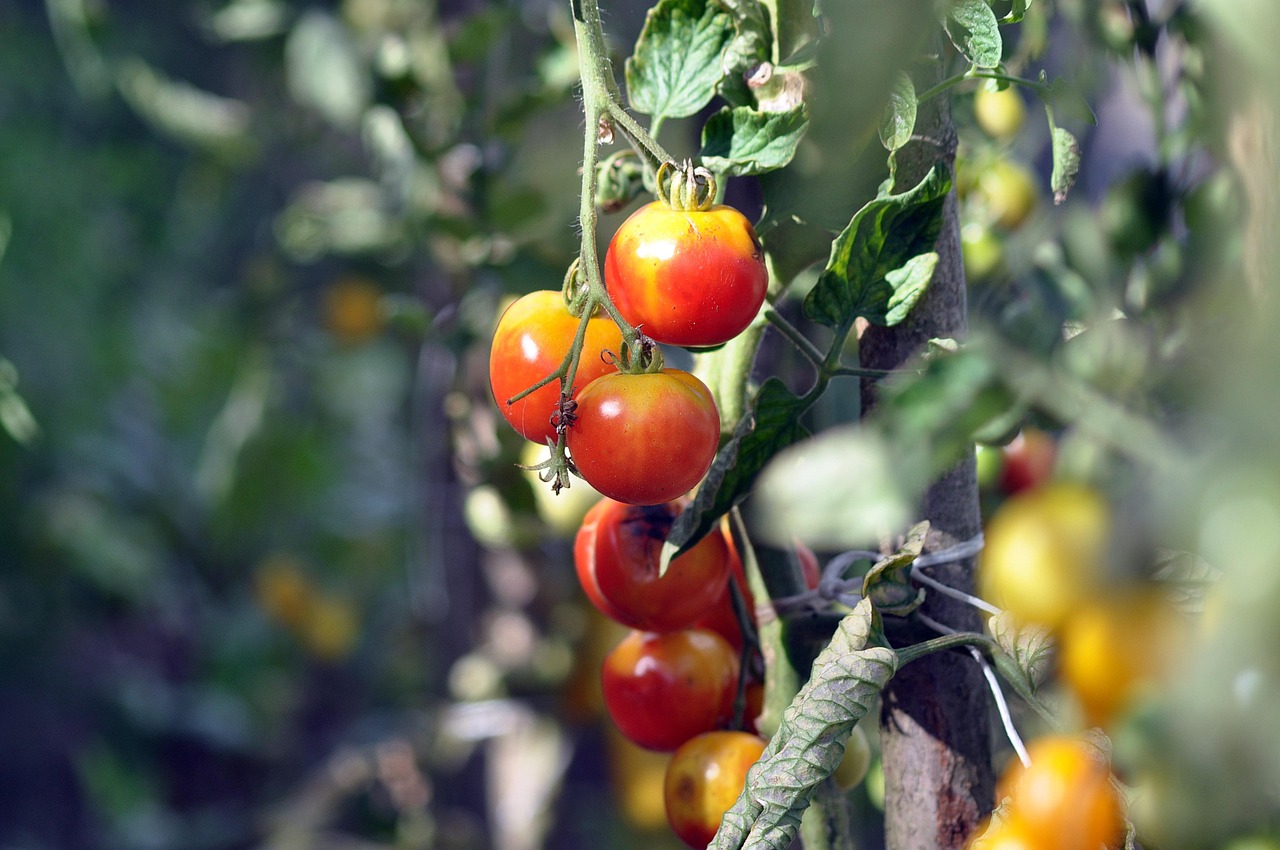
  • Good soil, where it produces an abundant harvest.

The Four Soils Represent Four Responses

  • The path symbolizes those who hear the message but don’t understand it. It gets snatched away quickly.
  • The rocky soil shows people who receive the message with joy, but fall away when trouble arises.
  • The thorny soil reflects those who grow for a time but are overcome by worries, riches, or busyness.
  • The good soil represents those who hear the Word, understand it, and produce a fruitful life.

This parable is about much more than farming—it’s about spiritual readiness and transformation.


The Parable of Sowing Seeds Meaning: Sowing and Reaping in the Bible


God’s Word Is the Seed

Throughout scripture, God’s Word is likened to a seed. It contains life, power, and potential. But just like any real seed, it needs proper conditions to grow. The condition of our hearts—our attitudes, priorities, and openness—determine whether the Word thrives or withers.


You Reap What You Sow

This concept isn’t just found in Jesus’ parables.

  • Galatians 6:7 – “Do not be deceived: God is not mocked, for whatever one sows, that will he also reap.”
  • Job 4:8 – “Those who plow iniquity and sow trouble reap the same.”
  • Proverbs 22:8 – “Whoever sows injustice will reap calamity.”

The takeaway is simple: good seeds yield good fruit—in both gardens and spiritual lives.


Lessons from the Sower

Jesus wasn’t just teaching about crops—He was calling people to examine their own hearts. The soil represents our readiness to receive and live by truth. This parable asks each of us:

  • Am I hard-hearted like the path?
  • Shallow like rocky soil?
  • Distracted like thorny ground?
  • Or fertile and fruitful like good soil?

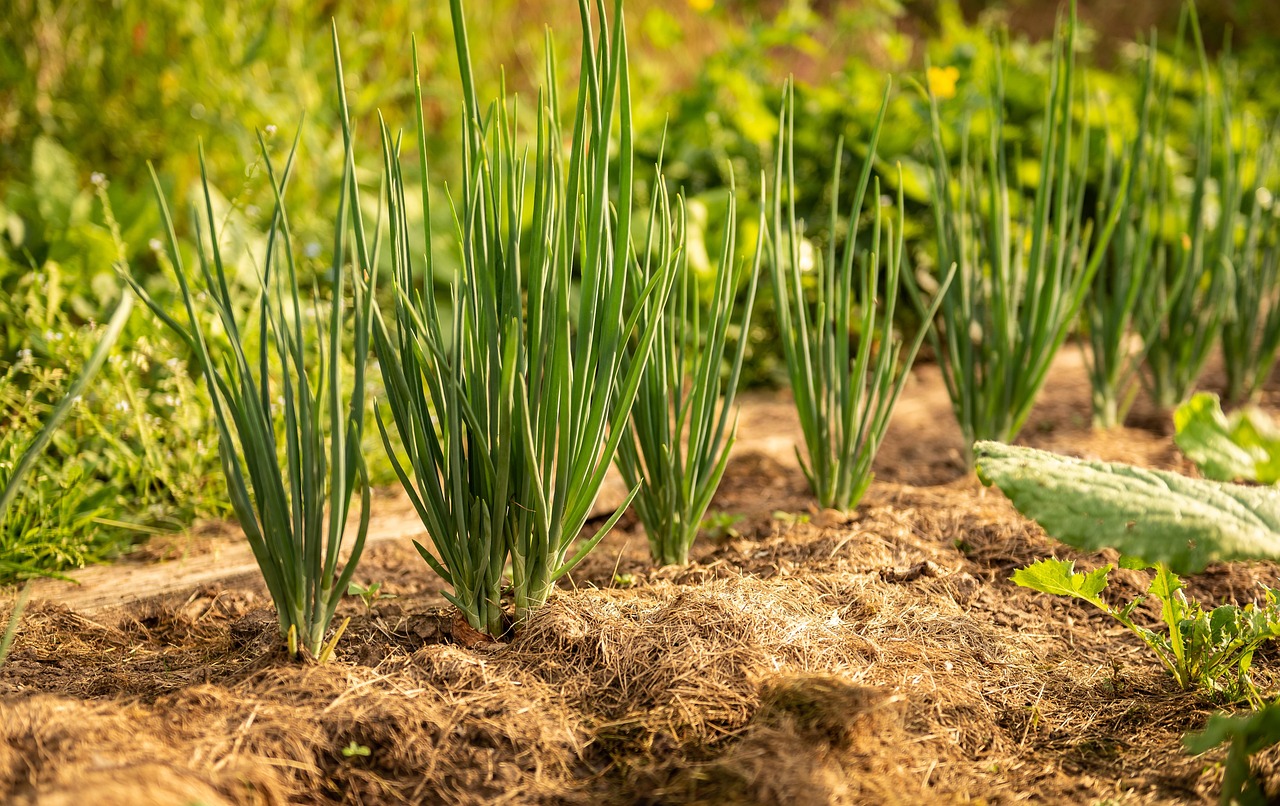
Organic Gardening as a Spiritual Metaphor
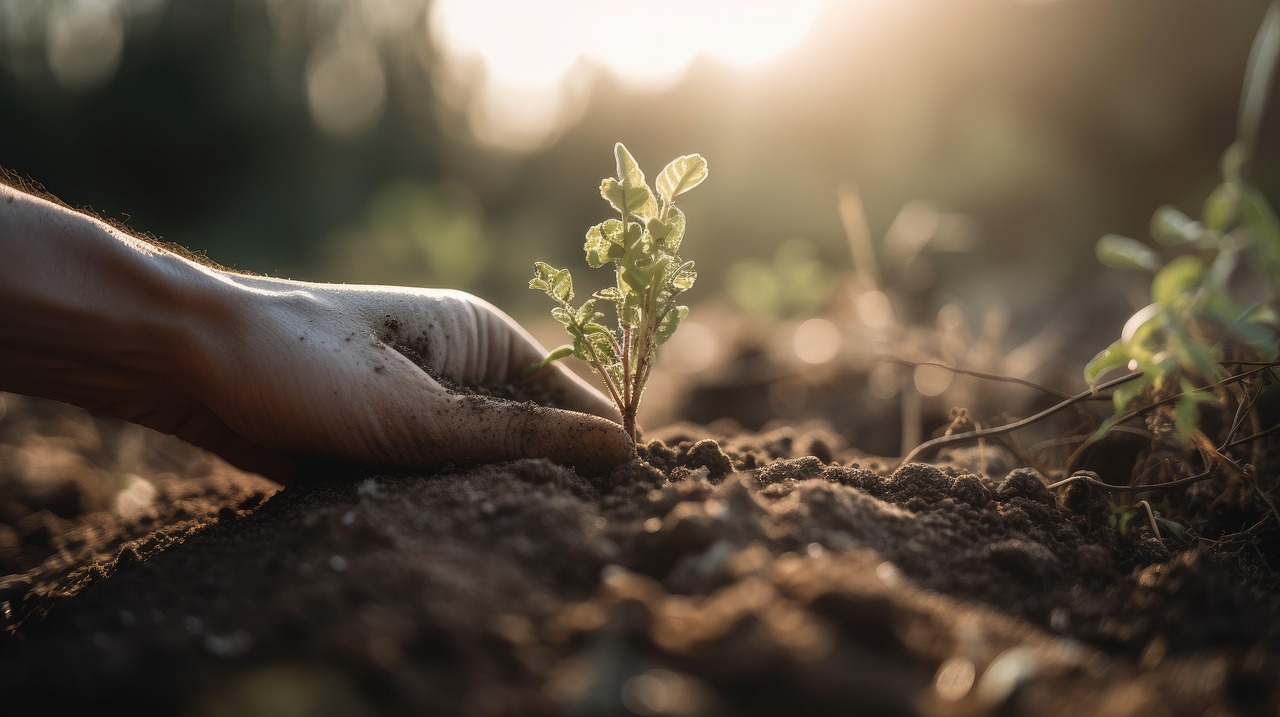
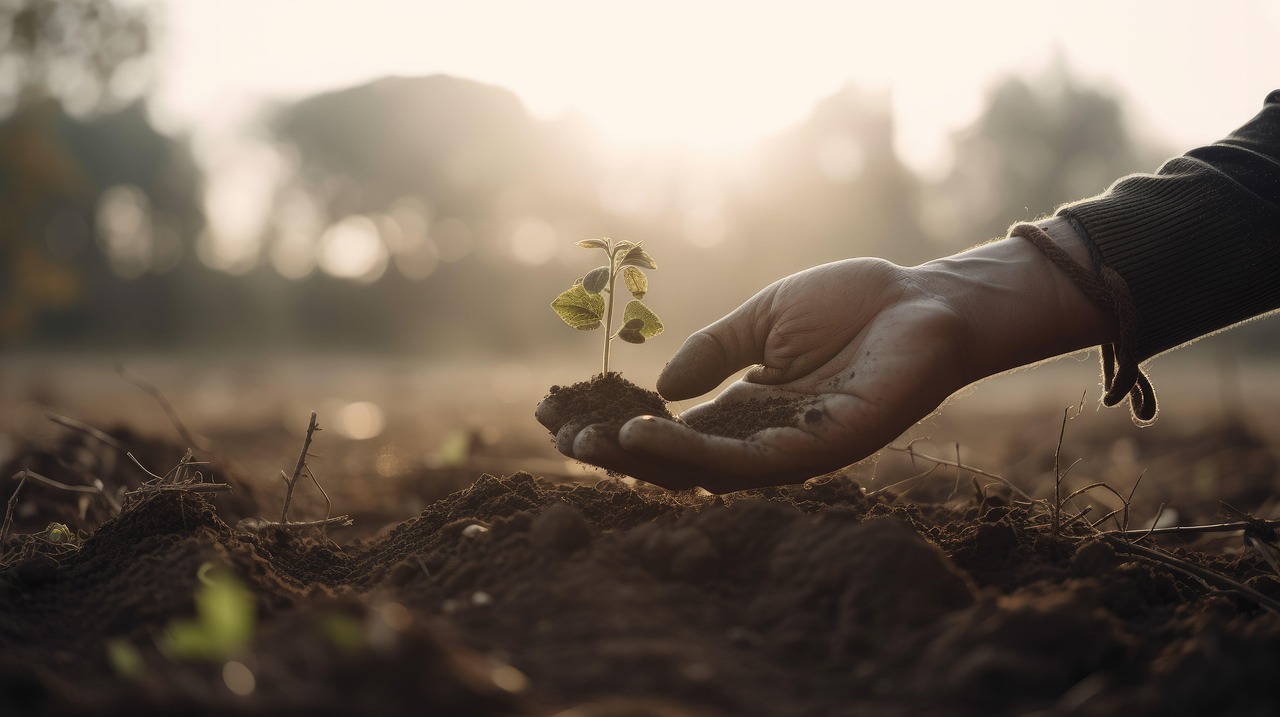

Preparing the Soil

This includes:

  • Removing rocks
  • Pulling weeds
  • Adding compost
  • Moistening dry soil

Similarly, preparing the spiritual soil of your heart requires:

  • Repentance
  • Prayer
  • Forgiveness
  • Letting go of pride or bitterness

The gardener’s role in the natural world mirrors God’s work in us—and the work we must do in ourselves.


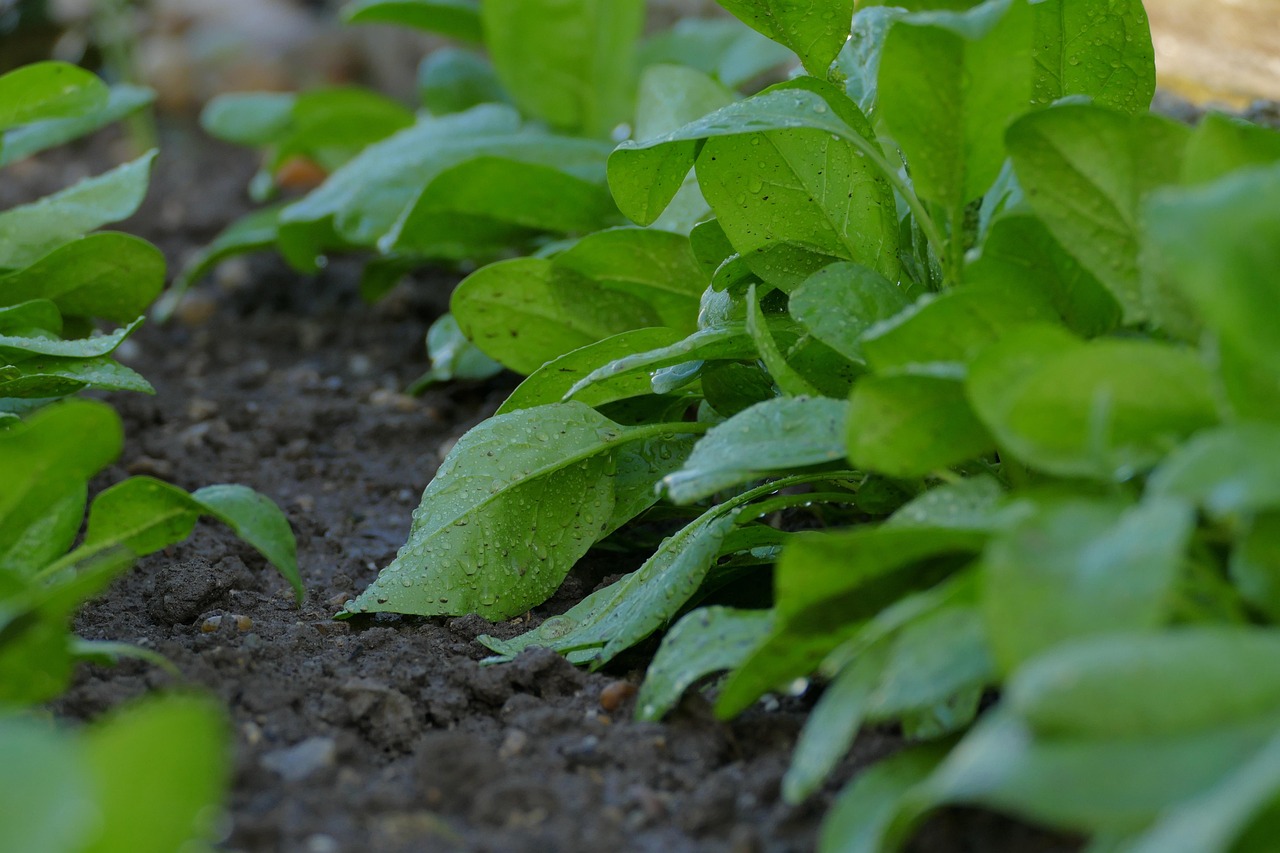
Watering, Weeding, and Watching Over Growth

Once a seed is planted, it needs constant care.

  • Prayer is spiritual watering
  • Bible study feeds the roots
  • Community keeps the weeds away

Faith Like a Mustard Parable of Sowing Seeds: Small Acts, Big Impact


Mustard Seed Faith

In Matthew 17:20, Jesus says that if you have faith as small as a mustard seed, you can move mountains. The message? Don’t underestimate the power of starting small. Even a small seed, when placed in good soil, can grow into something massive.

This truth applies to:

  • Prayer
  • Forgiveness
  • Starting a garden
  • Beginning a new habit
  • Teaching a child truth

Daily Choices as Seeds

Every action—kind or cruel, generous or selfish—is a seed. Our lives are gardens constantly being planted with what we say, do, and think.

Plant seeds of:

  • Encouragement instead of criticism
  • Generosity instead of greed
  • Patience instead of frustration

Teaching the Parable of Sowing Seeds to Children and Families

Use Hands-On Gardening to Teach the Parable of Sowing Seeds

Planting seeds with children brings the lesson to life. Let them:

  • Feel the soil
  • Water a seed
  • Watch it sprout
  • Compare growth in different conditions

Tie it back to spiritual lessons: what helps us grow, what hinders us, and what harvest we should expect.


Story Time and Scripture

Read the parable aloud from a children’s Bible, then ask:

  • What kind of heart do you want to have?
  • How do you keep weeds (bad influences) out?
  • What does “fruit” look like in our lives?

Parable of Sowing Seeds of Faith in the Modern World

Digital Planting: Social Media and Beyond

Every word you post is a seed. In a digital world full of negativity, you can:

  • Share verses or reflections
  • Encourage someone going through hardship
  • Post garden photos with spiritual captions
  • Write blogs like this one to teach others

Your online footprint is a planting field. Use it wisely.


Sowing at Work, School, and in Community

  • Be patient with co-workers
  • Lead with kindness and humility
  • Help someone in need without expecting praise
  • Invite someone to church or a gardening club

Faith isn’t just about words. It’s how you show up in the everyday world that makes the biggest impact.


Spiritual Gardening for Organic Growers

Parable of Sowing Seeds of Health and Hope

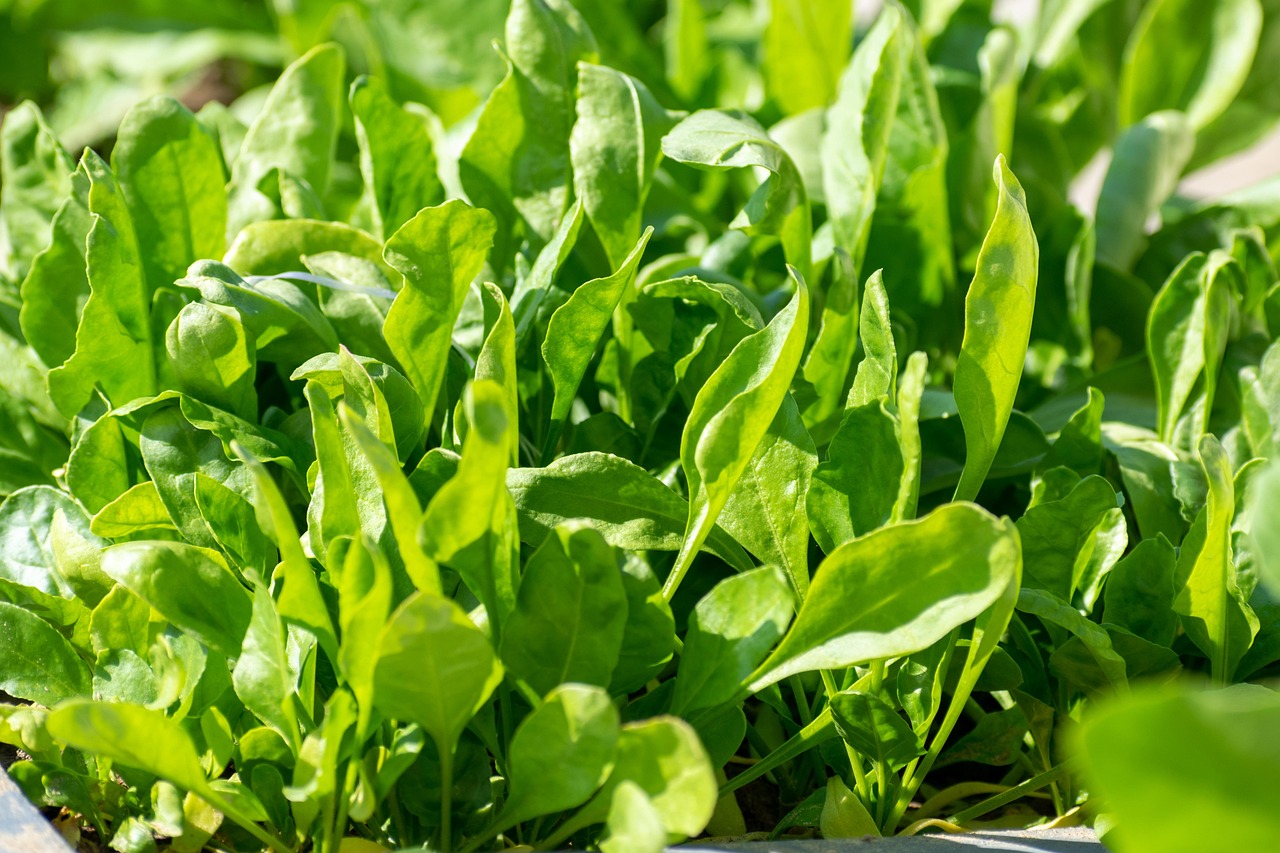
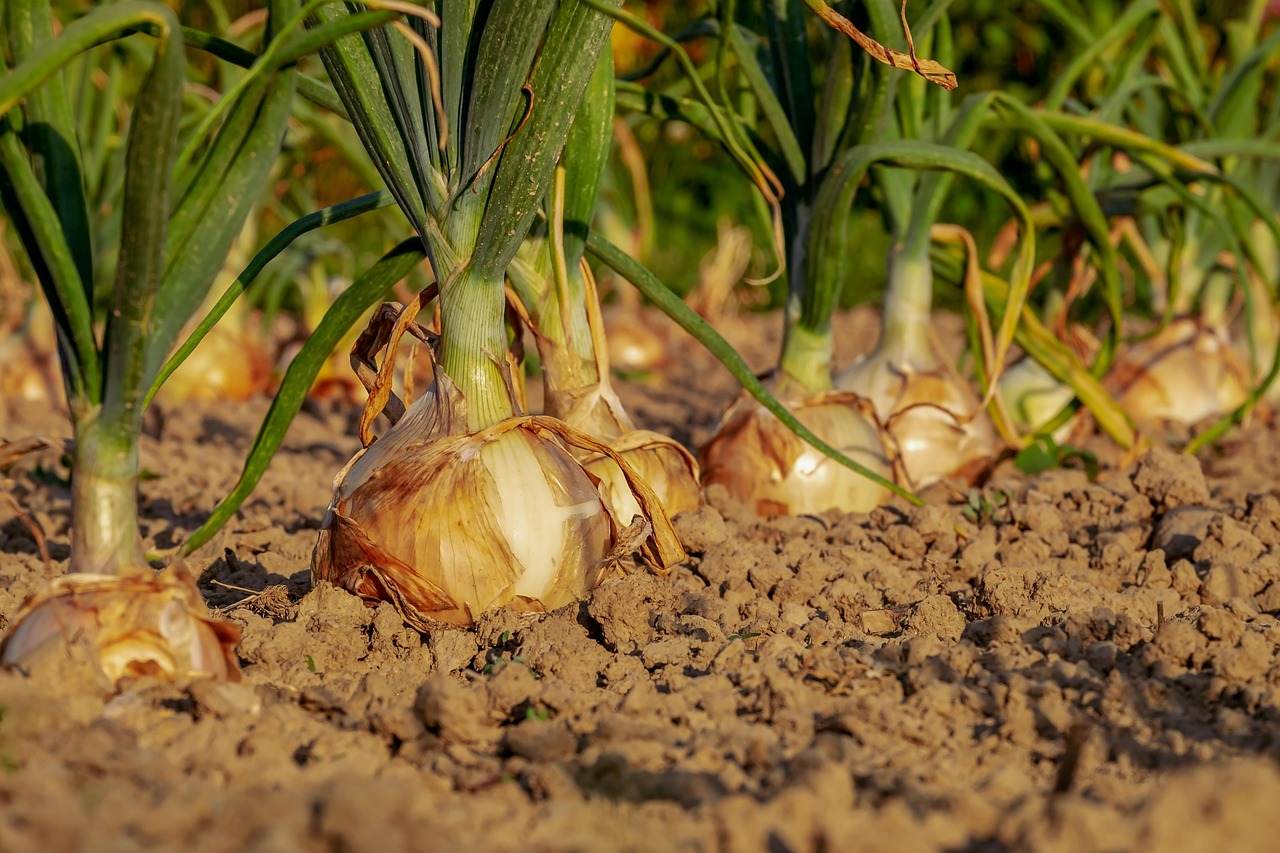
Many organic gardeners in the USA are discovering how gardening connects them to something bigger. Whether you’re in Illinois, Texas, California, or Vermont, planting food reminds us of:

  • God’s provision
  • The power of seasons
  • The value of nurturing life

Your garden is not just a plot—it’s a living parable.


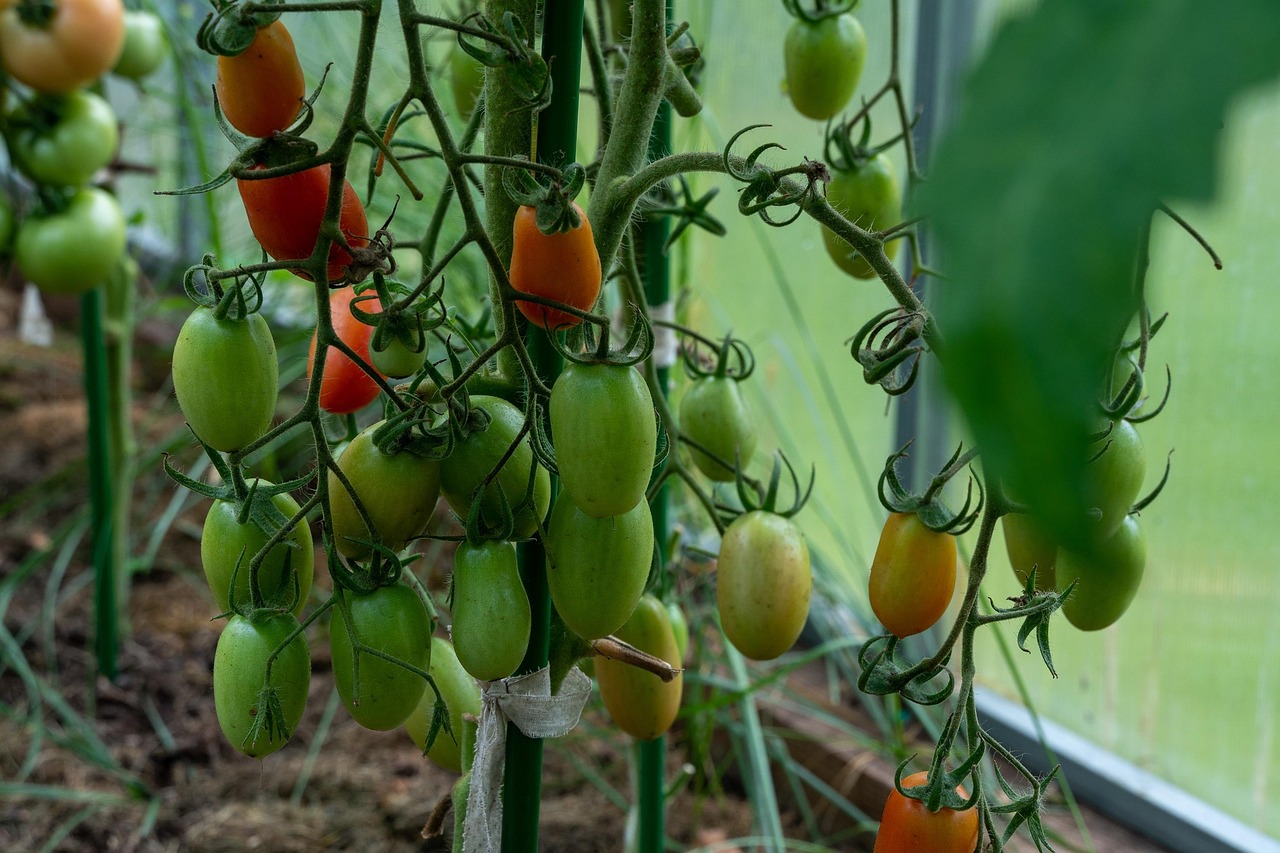
Devotional Gardens: Tending the Fruits of the Spirit

Why not design your garden around Galatians 5:22–23?

  • Love – roses or red zinnias
  • Joy – bright sunflowers
  • Peace – lavender or chamomile
  • Patience – slow-growing herbs
  • Kindness – give your veggies to a neighbor
  • Faithfulness – tend your garden daily
  • Gentleness – avoid harsh chemicals
  • Self-control – weed consistently

Evaluating Your Heart: What Kind of Soil Are You?

Personal Reflection

Ask yourself:

  • Am I distracted?
  • Am I shallow in my commitment to faith?
  • Am I growing in wisdom, kindness, and truth?

Just like gardeners test their soil, believers must check their hearts regularly.


Be the Good Soil

You don’t become good soil by accident. You become it by:

  • Showing up daily in prayer
  • Creating time for God
  • Seeking understanding
  • Practicing gratitude
  • Removing sin like you’d remove rocks

Frequently Asked Questions:

What is the main lesson of the parable of sowing seeds?

The main lesson is that the condition of our hearts determines how well we receive and grow from God’s Word.

How does the parable relate to real-life gardening?

Just like seeds need good soil, water, and care to grow, our lives need spiritual nourishment and discipline to thrive.

Why did Jesus teach in parables like this?

Jesus used parables to reveal deep truths in simple stories, making spiritual lessons relatable and memorable.

Final Thoughts: Parable of Sowing Seeds

Whether you’re planting real seeds in your organic garden or sharing encouragement with a neighbor, you are making an eternal difference.

The parable of sowing seeds reminds us:

  • Every seed counts.
  • Growth takes time.
  • The right soil changes everything.
July 22, 2025 0 comments
0 FacebookTwitterPinterestThreadsBlueskyEmail
seed sowing equipment
Gardening

Seed Sowing Equipment

by aneeqrauf01@gmail.com July 22, 2025
written by aneeqrauf01@gmail.com

Seed Sowing Equipment


Seed Sowing Equipment for Organic Gardening in the USA

Sowing seeds is one of the most fundamental and rewarding parts of gardening. Whether you’re tending to a small backyard plot or growing vegetables on a larger homestead, using the right seed sowing equipment can make all the difference. For organic gardeners across the United States, choosing tools that are efficient, sustainable, and tailored to your garden size is key to a productive and eco-friendly growing season.

In this guide, we’ll explore a wide range of seed planting tools, how they function, and which options work best for different garden setups. We’ll also dive into popular choices among American gardeners, focusing on equipment that supports organic gardening practices.


What Is Seed Sowing Equipment?

Seed sowing equipment refers to any tool that assists with the planting of seeds in soil. These can be as simple as a wooden dibber or as advanced as a multi-row push seeder.

Whether you’re growing lettuce in a raised bed or corn in a half-acre plot, sowing tools improve:

  • Seed placement
  • Germination consistency
  • Garden organization
  • Time efficiency
  • Physical comfort during planting

The goal is to plant smarter—not harder—while aligning with the principles of organic gardening.


The Benefits of Using Seed Sowing Equipment in Organic Gardening

1. Enhanced Seedling Success

Precise sowing means your seeds are planted at the right depth and spacing, which improves root development, moisture uptake, and nutrient access—without crowding.

2. Time-Saving Planting

Manual seeding takes hours and can strain your back. With the right tools, you can plant entire beds in a fraction of the time.

3. Seed Efficiency and Cost Savings

Organic seeds, especially heirlooms and non-GMO varieties, can be expensive. Equipment helps reduce waste by preventing over-seeding and minimizing thinning.

4. Weed Management

Correct spacing allows for airflow and easy cultivation between plants, helping suppress weeds without herbicides.

5. Soil Health Preservation

Tools like no-till seeders and shallow dibbers reduce soil disturbance, maintaining microbial activity and organic matter levels essential to soil biology.


Types of Seed Sowing Equipment

Let’s explore the main categories of seed sowing tools and how they serve different garden sizes and seed types.


1. Hand-Held Seeders

These are small, inexpensive tools perfect for gardeners growing in containers, raised beds, or small garden plots.

Benefits: Seed Sowing Equipment

  • Great for fine seeds (e.g., basil, lettuce, carrots)
  • Easy to use and clean
  • Prevents clumping or over-sowing

Common brands include Jiffy Hand Seeders, Fiskars Dispensers, and generic rotary seeders.


2. Push Seed Planters

Push planters allow you to walk down a garden row, simultaneously opening a furrow, dropping seeds, covering them, and lightly pressing them into the soil.

Best For:

  • Corn
  • Beans
  • Cucumbers
  • Pumpkins
  • Sunflowers

Most push planters come with interchangeable seed plates that let you adjust for seed size and spacing.


3. Precision Seeders

These tools deliver one seed at a time with exact spacing—ideal for crops like:

  • Carrots
  • Spinach
  • Onions
  • Radishes
  • Beets

Commonly used by small organic farmers, CSA growers, and urban homesteaders, precision seeders eliminate the need for thinning and prevent seed waste.


4. Manual Row Markers and Dibbers

Not all tools plant the seeds—some are used to mark where they go.

Examples:

  • Row markers keep plantings neat and spaced evenly.
  • Dibbers create uniform holes for seeds or transplants.
  • Garden trowels with depth gauges ensure consistency.

They’re inexpensive, essential, and perfect for garden planning.


5. Earthway and Wheel-Driven Seeders

Wheel-driven seeders (like the Earthway Precision Garden Seeder) are great for larger garden plots. They’re designed for speed and efficiency without fuel or electricity.

They are adjustable for:

  • Seed spacing
  • Row width
  • Depth of planting

These are highly recommended for organic market gardeners or anyone growing multiple vegetable types.


6. No-Till Seed Drills

No-till seeders or drills are advanced tools that open a small slit in the soil, drop seeds, and close it—without disrupting the soil structure. They are ideal for:

  • Cover cropping
  • Conservation farming
  • Soil regeneration

Although typically used in commercial settings, scaled-down versions exist for small farms and large home gardens.


Choosing the Right Seed Sowing Equipment for Your Garden Size

Every garden is different. The equipment you choose should match the scale and style of your growing space.

Small Gardens or Containers (under 100 sq ft)

Tools to consider:

  • Hand seeders
  • Seed spacing sticks
  • Mini dibbers

These are ideal for tight spaces, square-foot gardening, and patios.

Backyard Gardens (100–500 sq ft)

Tools to consider:

  • Push seeders
  • Row markers
  • Manual precision seeders

Perfect for raised beds, medium rows, or backyard plots.

Large Gardens or Homesteads (500–2000 sq ft)

Tools to consider:

  • Earthway or Hoss push planters
  • Rolling dibbers
  • Adjustable multi-row seeders

This scale benefits from time-saving equipment.

Small Organic Farms (over 2000 sq ft)

Tools to consider:

  • Multi-row no-till seed drills
  • Wheel-driven row planters
  • Commercial-scale seeders with adjustable features

Ideal for diversified market gardening and CSA operations.


Seed Sowing Equipment Types and Their Equipment Match

Certain tools work better depending on seed size, shape, and fragility.

Small & Light Seed Sowing Equipment

Examples: Lettuce, carrot, amaranth
Tool Match: Precision hand seeders, seed rollers, vacuum seeders

Medium-Sized Seed Sowing Equipment

Examples: Beans, peas, radishes
Tool Match: Push planters, multi-seed plate tools

Large Seeds

Examples: Corn, squash, melons
Tool Match: Push seeders, Earthway-style row planters

Irregular Seeds

Examples: Parsley, celery
Tool Match: Manual placement tools, adjustable dispensers

Seed Sowing Equipment for Specific Organic Crops

Organic gardeners grow a wide variety of crops. Here’s how seed sowing tools apply to some of the most common:


Lettuce and Leafy Greens

  • Use precision seeders or seed dispensers
  • Shallow depth
  • High germination need

Carrots and Root Crops

  • Best with manual seeders that allow tiny seed control
  • Depth is crucial—too deep can reduce success

Corn and Beans

Ensure wide row spacing

Ideal for push planters

Large seeds, easier to handle manually

Secondary Seed Sowing Equipment and Accessories

Seed Plates and Discs

Interchangeable components used with seeders to match different seed sizes and shapes.

Seed Hoppers

Where seeds are stored in the tool during sowing—important for large-quantity planting.

Row Spacers

Attach to tools or used manually to maintain ideal spacing between planting lines.

Soil Tampers

Used to gently press the soil over seeds without compacting.

Top Features to Look for in Seed Sowing Equipment

Adjustable Depth Control

Ensures seeds are planted at the proper depth for optimal germination.

Interchangeable Seed Plates

Ideal for gardeners who grow a variety of crops with different seed sizes.

Ergonomic Design

For comfort and ease of use, especially when planting large beds.

Durability and Sustainability

Look for tools made from stainless steel, wood, or recycled materials that support eco-friendly gardening.


Tips for Proper Seed Sowing Equipment in Organic Gardens

Even with good tools, technique matters. Here are some seed sowing best practices to maximize success.


1. Prep the Soil

  • Loosen soil down 4–6 inches
  • Add compost or worm castings
  • Rake the surface level

2. Use Tools with Care

  • Clean and calibrate tools before planting
  • Adjust for spacing based on seed packet instructions
  • Sow during cool parts of the day

3. Water Wisely

  • Lightly water after sowing
  • Avoid overwatering; too much water causes seeds to rot
  • Use drip irrigation or watering cans for precision

Maintaining and Storing Seed Sowing Equipment

Like all garden tools, seed sowing gear lasts longer with proper care.

Cleaning

  • Remove all leftover seed debris
  • Use a soft brush and water to clean parts
  • Avoid harsh detergents on plastic parts

Maintenance

  • Oil moving metal parts
  • Check seed plates for cracks or warping
  • Replace worn wheels or belts

Storage

  • Store in a dry, sheltered space
  • Hang tools on racks or wall hooks
  • Keep hand tools in toolboxes or garden sheds

Where to Buy Seed Sowing Tools in the USA

You can find great quality seed sowing equipment at:

  • Johnny’s Selected Seeds (Maine)
  • Hoss Tools (Georgia)
  • Earthway Products (Indiana)
  • Bootstrap Farmer (Texas)
  • GrowOrganic.com (California)
  • Local farm co-ops and gardening centers

Common Mistakes When Using Seed Sowing Equipment

Planting Seeds Too Deep

Many beginners don’t adjust depth properly. Follow crop-specific guidelines.

Not Cleaning Equipment

Seeds may stick, or tools may rust—regular maintenance keeps tools functional.

Using the Wrong Seed Plate

This can jam the tool or misplace seeds. Always match plate to seed size.

Sowing Without Planning

Sketch your garden bed layout to align crop rotation and companion planting strategies.


Sustainability and Eco-Friendly Practices

When buying tools, consider:

  • Locally made tools to reduce emissions
  • Durable materials like stainless steel or wood
  • Multi-purpose tools that reduce waste

Some tools are made with recycled plastic or come with lifetime warranties—investments that align with organic values.


Seed Sowing Equipment and Garden Planning

Pair your tools with planning techniques for better results:

  • Use planting calendars
  • Sketch crop rotations
  • Plan for succession sowing

Some advanced tools allow row spacing tracking and digital planting logs. This data is gold for improving year after year.


FAQs: about Seed Sowing Equipment

Q1: What is the best seed sowing equipment for small gardens?

Hand-held seeders and dibbers are perfect for small gardens, providing control and precision without bulky machinery.

Q2: Can seed sowing equipment be used for organic farming?

Yes, most seed sowing tools are manual or mechanical and fully compatible with organic farming practices.

Q3: How deep should I sow seeds using a seeder?

It depends on the seed type, but most seeders are adjustable to match recommended sowing depths listed on seed packets.

Q4: Are precision seeders worth the investment?

Absolutely—precision seeders reduce waste, improve spacing, and eliminate the need for thinning, especially for fine seeds.

Conclusion: Seed Sowing Equipment

When you choose the right seed sowing equipment, you’re not just making planting easier—you’re improving germination, saving time, reducing waste, and honoring your values as an organic gardener.

Whether you’re nurturing herbs on a balcony or growing vegetables for your local farmers’ market, there’s a tool that matches your scale, your seeds, and your soul.

Plant smarter. Sow with care. Let nature do the rest.

July 22, 2025 0 comments
0 FacebookTwitterPinterestThreadsBlueskyEmail
sowing seeds
Gardening

Sowing Seeds

by aneeqrauf01@gmail.com July 22, 2025
written by aneeqrauf01@gmail.com

Sowing Seeds

Sowing seeds is the foundation of every thriving garden. Whether you’re planting tomatoes in raised beds, herbs on your balcony, or wildflowers in open meadows, understanding the proper techniques for seed sowing is essential for healthy, vibrant growth. In this guide, we’ll walk you through everything you need to know about sowing seeds—indoors or outdoors—using organic methods tailored to U.S. climates and growing zones.


Why Sowing Seeds Matters in Organic Gardening

Grow From the Ground Up

Sowing seeds allows you to control every step of the plant’s life—from soil conditions to organic input, free of synthetic fertilizers or pesticides.

Organic Seeds = Clean Food

Starting from organic, non-GMO, or heirloom seeds ensures your harvest is clean, resilient, and rooted in tradition. These seeds are not chemically treated, making them safe for pollinators and children alike.

A Sustainable, Affordable Start

Sowing seeds is also cost-effective. One packet can produce dozens of plants—far more affordable than transplants. Plus, it reduces plastic waste and fossil fuels used in nursery plant production and transportation.


Understanding Sowing Seeds Germination and Biology

What Every Gardener Should Know

Seed germination is the process by which a seed sprouts and begins to grow into a seedling. Germination is affected by:

  • Moisture
  • Temperature
  • Light (or darkness)
  • Oxygen
  • Seed quality

The Germination Stages

  1. Imbibition: The seed absorbs water and swells.
  2. Enzyme Activation: Stored nutrients begin to break down.
  3. Radicle Emergence: The root breaks through first.
  4. Shoot Growth: The shoot emerges and reaches toward light.
  5. True Leaves Appear: Photosynthesis begins.

Understanding these stages allows you to better nurture your seeds and troubleshoot when things go wrong.


How to Choose Sowing Seeds for Your Garden

Select the Right Seeds for Your USDA Zone

The United States is divided into USDA plant hardiness zones. Choose seeds that match your climate:

  • Zones 3–5: Short growing season. Start seeds indoors.
  • Zones 6–8: Balanced indoor and direct sowing opportunities.
  • Zones 9–11: Warm-season crops thrive. Can sow most plants year-round.

Organic, Heirloom, and Native Seeds

  • Organic seeds are untreated and grown without chemicals.
  • Heirloom seeds are open-pollinated, often passed down for generations.
  • Native seeds support biodiversity, pollinators, and adapt well to local conditions.

Types of Sowing Seeds Methods

Indoor Seed Starting

Perfect for early spring or colder USDA zones. Start seeds indoors under controlled conditions to extend the growing season.

  • Use seed starting trays with humidity domes
  • Add grow lights for proper photosynthesis
  • Use organic seed starting mix—light and fluffy with compost

Outdoor or Direct Sowing

Great for hardy vegetables and flowers like carrots, spinach, sunflowers, and peas.

  • Sow seeds directly in raised beds or garden soil
  • Follow seed spacing and depth instructions
  • Mulch lightly after sowing seeds to retain moisture

Broadcast Sowing

This method is popular for wildflowers and cover crops. Scatter seeds over the soil and lightly rake them in. Best for sowing native plant seeds or pollinator gardens.ontainers offer controlled environments. Make sure your soil drains well and is enriched with compost.


Step-by-Step Guide to Sowing Seeds

1. Prepare the Soil

Use well-drained, fertile soil rich in organic matter. Loosen it to a depth of 6–12 inches, remove rocks, and mix in compost.

2. Moisten the Soil

Water your soil before sowing so it’s damp but not soggy. This encourages seed-to-soil contact and helps kickstart germination.

3. Measure Depth and Spacing

Follow directions on the seed packet. A general rule: plant seeds at a depth 2–3 times their diameter. Avoid overcrowding—proper seed spacing is key to healthy growth.

4. Sow the Seeds

Place seeds evenly and gently cover with soil. Pat down to ensure contact. Label everything clearly with waterproof markers.

5. Water Gently

Use a fine mist or spray bottle to avoid displacing seeds. Keep soil consistently moist until germination occurs.

Best Time to Sowing Seeds by Season

Spring Sowing Seeds

Perfect for leafy greens, tomatoes, and herbs. Start indoors in late winter, or sow cool-weather crops directly into the soil.

Summer Sowing Seeds

Plant warm-season crops like squash, beans, and corn. Ensure soil temps are optimal.

Fall Sowing Seeds

Ideal for crops like kale, spinach, and garlic. Sow seeds that thrive in cooler conditions.

Winter Indoor Sowing

Use grow lights for seed starting and heat mats. Start peppers, onions, or even early flowers indoors to get a head start.


Advanced Tips for Organic Sowing Seeds Success

Cold Stratification

Some seeds (like milkweed or lavender) need a period of cold before they’ll germinate. Mimic nature by refrigerating them in moist paper towels for 2–8 weeks.

Seed Scarification

Tough-coated seeds like nasturtiums or morning glories benefit from scarification—gently scratching or soaking the seed coat to encourage sprouting.

DIY Seed Starting Mix

Make your own blend:

  • 1 part compost
  • 1 part coconut coir or peat
  • 1 part perlite or vermiculite
  • A sprinkle of worm castings or kelp meal

Common Sowing Seeds Mistakes and Fixes

Planting Too Deep

Many seeds fail because they’re planted too deep. When in doubt, sow shallower rather than deeper.

Overwatering

Too much water suffocates seeds and leads to rot. Keep soil evenly moist, not soaking.

Not Enough Light Indoors

Seedlings become leggy when they stretch for light. Use full-spectrum grow lights if sunlight is limited.

Skipping Hardening Off

Before transplanting, harden off seedlings by exposing them to the outdoors gradually over 7–10 days. This prevents transplant shock.


Sowing Seeds for Continuous Harvest

What is Succession Sowing?

Instead of planting all seeds at once, sow a few every 2–3 weeks. This staggered approach leads to continuous harvests and reduced waste.

Best Crops for Succession Sowing

  • Lettuce
  • Spinach
  • Radishes
  • Carrots
  • Bush beans

Track planting dates in a garden journal to manage your calendar.


Sowing Seeds for Different Plant Types

Vegetables

  • Tomatoes and Peppers: Start indoors 6–8 weeks before last frost
  • Carrots and Beets: Direct sow in loose, rock-free soil
  • Zucchini and Cucumbers: Can be direct sown or started indoors

Herbs

  • Basil: Sow indoors or direct sow in warm weather
  • Parsley: Slow to germinate—soak seeds beforehand
  • Cilantro: Best direct sown; bolts quickly in heat

Flowers

  • Marigolds and Cosmos: Easy from seed
  • Sunflowers: Direct sow once soil warms
  • Native Wildflowers: Fall sowing or cold stratification may be needed

How to Support Seedlings After Germination

Watering Techniques

Use bottom watering to avoid fungal disease. Let the tray sit in water for 15–20 minutes, then drain.

Feeding Seedlings

After true leaves appear, feed weekly with diluted organic fertilizer like compost tea, fish emulsion, or seaweed extract.

Thinning

Thin crowded seedlings to prevent disease and allow air circulation. Snip at the base rather than pulling to avoid disturbing roots.


Organic Pest Management for Seedlings

Common Pests

  • Aphids
  • Fungus gnats
  • Cutworms
  • Slugs

Natural Solutions

  • Neem oil spray
  • Diatomaceous earth around seedlings
  • Row covers for physical protection
  • Companion planting (e.g., marigolds for pest deterrence)

Saving Sowing Seeds for the Next Season

Why Save Seeds?

Saving seeds encourages plant adaptation, saves money, and builds community resilience. It’s also part of traditional organic gardening practices.

How to Save Sowing Seeds

  • Allow the plant to fully mature
  • Dry seeds completely before storing
  • Store in labeled paper envelopes or glass jars in a cool, dark place

Sowing Seeds and Soil Health

Compost Matters

Healthy soil grows healthy plants. Add finished compost to seed beds to improve structure, retain moisture, and feed microbes.

Mulching After Sowing

A thin layer of straw or shredded leaves helps retain moisture and suppress weeds. Just be sure not to bury tiny seeds.


FAQs: on Sowing Seeds

What is the best time of year to sow seeds?

Depends on your USDA zone. Indoors: late winter to early spring. Outdoors: after your last frost date.

Can I reuse seed trays?

Yes, but sterilize them with vinegar or a mild bleach solution to prevent disease.

What’s the difference between sowing and planting?

Sowing refers specifically to starting from seed, while planting can include transplants or bulbs.

How do I know if seeds are still viable?

Do a germination test—soak 10 seeds in a damp paper towel, wait 7–10 days, and count how many sprout.

Final Thoughts: Sowing Seeds

Sowing seeds is more than planting—it’s a powerful act of creation. In organic gardening, it connects you to your food, your environment, and your community. Whether you’re starting a backyard food forest or planting herbs on your balcony, every seed contains a world of potential.

By understanding when, where, and how to sow seeds organically, you’re not only growing a garden—you’re cultivating a better future.


July 22, 2025 0 comments
0 FacebookTwitterPinterestThreadsBlueskyEmail
spinach plant spacing
Gardening

Spinach Plant Spacing

by aneeqrauf01@gmail.com July 22, 2025
written by aneeqrauf01@gmail.com

Spinach Plant Spacing

Spinach Plant Spacing – The Key to a Lush, Healthy Organic Garden

If you’re growing spinach in your organic garden, one of the most critical decisions you’ll make is how far apart to plant your spinach. Proper spinach plant spacing can mean the difference between a lush, bountiful harvest and a crowded, underperforming patch. Whether you’re growing in containers, raised beds, or open ground, giving your spinach the right amount of room is essential to support healthy growth, airflow, and optimal yield.

In this guide, tailored for a USA-based organic gardening audience, we’ll walk you through best practices for spacing spinach, explain how to adjust spacing depending on growing methods, and provide tips on companion planting, thinning, succession planting, and more.


What Makes Spinach Unique Among Leafy Greens?

Spinach Growth Habits and Plant Profile

Spinach (Spinacia oleracea) is a cool-season crop that prefers shorter days and mild temperatures. It grows quickly and can mature in as little as 35–45 days, depending on the variety. Most spinach plants develop a compact rosette of leaves and a relatively shallow root system, making spacing and soil care especially important.

Overcrowding causes stress, encourages bolting, and invites pests and mildew.

How Far Apart to Spinach Plant Spacing – The Basics

Spinach Seed Spacing

If you’re direct sowing spinach seeds, space them about 1 inch apart in rows. Once the seedlings emerge and reach a few inches in height, thin spinach seedlings to maintain 3–4 inches of spacing between each plant.

Spinach Row Spacing Guide

  • Traditional row spacing: 12 to 18 inches between rows
  • Intensive gardening methods: 6 to 8 inches between rows if airflow is sufficient

Spacing for Baby Spinach

If you’re growing baby spinach, which is harvested earlier and doesn’t require full leaf development, you can plant seeds closer together — around 2 inches apart. Baby spinach benefits from tighter spacing because it encourages tender leaves and quick turnover.


Why Spinach Plant Spacing Is So Important

The Science Behind Plant Spacing

Even though spinach has a small footprint, every plant still needs space to thrive. When spaced correctly, spinach receives the proper amount of sunlight, air, and nutrients.

Airflow Prevents Fungal Disease

Organic gardeners avoid synthetic fungicides, so airflow is your first line of defense. Crowded spinach is more likely to trap moisture on the leaves, increasing the risk of mildew, rust, and downy mildew — especially in humid states.

Better Leaf Size and Flavor

Proper spacing ensures that each plant can focus its energy on leaf production. You’ll notice your spinach has larger, crisper leaves with better flavor when spaced correctly — especially if you’re growing it for fresh eating rather than cooking.

Healthier Root Systems

Each spinach plant forms a tight but shallow network of roots. When too many plants are forced to share space, they compete underground, weakening growth and leading to uneven development.


Growing Spinach Plant Spacing in Containers: Space Tips

Spacing Spinach in Small Spaces

Urban gardeners or those with limited yard space love growing spinach in pots, planters, and containers.

Here’s how to do it:

  • Choose wide containers (12–24 inches across)
  • Ensure 6–8 inches of depth for roots
  • Leave 3 inches between each spinach plant
  • Thin young seedlings early to avoid root damage

Square Foot Gardening Spinach Plant Spacing

The 9-Plant Per Square Foot Rule

Square foot gardening is a tidy, efficient method perfect for backyard raised beds.

  • Mark out 12×12 inch squares
  • Plant 9 spinach seeds per square, arranged evenly in rows of 3×3
  • Thin to one plant per position after germination

You’ll be surprised how much food you can grow this way!


Raised Bed Spinach Plant Spacing: Get the Most from Your Garden

Spacing in Raised Beds for Bigger Yields

Raised beds offer perfect drainage, easy access, and warmer soil temperatures in spring and fall.

  • Stagger plants in a zigzag formation
  • Keep 4 inches between plants
  • Maintain 8–10 inches between rows
  • Thin as needed for air movement

Thinning Spinach Plant Spacing the Right Way

Don’t Skip This Step!

Once your spinach seedlings sprout, you’ll need to thin them to prevent overcrowding.

  • Remove the weakest plants using scissors
  • Leave the strongest with 3–5 inches of space
  • Eat the thinnings! Baby spinach is delicious

Skipping this step is one of the most common mistakes in spinach gardening.

Transplant Spinach Plant Spacing Starts

  • Plant 3–5 inch tall seedlings about 4 inches apart.
  • Avoid disturbing the roots too much during transplant.
  • Water well immediately after planting.

This transplant spacing for spinach ensures the plants are well-established and can quickly resume growth.


Succession Planting and How Spacing Affects It

Grow Spinach All Season Long

Succession planting is a strategy that allows you to stagger your spinach crop throughout the season:

  • Plant new spinach every 10–14 days
  • Harvest older rows while new rows mature
  • Adjust spacing to avoid overcrowding

In warmer USDA zones (9–11), succession planting in fall and winter is ideal. In cooler zones (3–6), plant early spring and again in late summer.

This technique helps keep spinach coming for months!


Spinach Plant Spacing in Cold Frames and Greenhouses

Spacing for Cold Season Gardening

  • Use the same spacing as outdoor beds: 3–4 inches per plant
  • Keep rows well-ventilated to prevent condensation and mold
  • Consider companion crops like lettuce or chard

Spinach Plant Spacing in Hydroponics

How to Space Spinach in Soilless Systems

In hydroponic systems:

  • Space net pots or rockwool cubes 4–5 inches apart
  • Maintain consistent airflow using fans
  • Keep lights evenly distributed

Spinach grown hydroponically can be harvested more frequently — spacing ensures clean leaves, fewer pests, and better quality.


Companion Planting for Spinach

Space-Saving and Pest-Preventing Partnerships

Companion planting is a staple in organic gardening. It allows you to use space wisely and improve soil and pest resistance.

Great companions for spinach:

  • Radishes – break up soil
  • Lettuce – shallow roots won’t compete
  • Beans and peas – fix nitrogen for leaf production
  • Chives and onions – repel aphids and leaf miners

Avoid:

  • Tall crops like corn – they’ll block needed sun
  • Potatoes – compete underground for nutrients

Spinach Plant Spacing According to Your USDA Gardening Zone

Regional Spacing Considerations Across the USA

In the United States, growing spinach can look very different depending on your USDA Hardiness Zone:

  • Zones 3–5: Space generously to reduce freeze damage
  • Zones 6–8: Moderate spacing and multiple planting seasons
  • Zones 9–11: Space wider to prevent overheating and bolting

Organic Gardening Best Practices for Spinach Plant Spacing

Healthy Plants Start with Healthy Soil

Use compost, worm castings, bone meal, or kelp meal to feed your soil naturally.

  • Rotate spinach with legumes to restore nitrogen
  • Use mulch to retain moisture between plants
  • Water deeply but infrequently to promote strong roots

These practices go hand-in-hand with proper spacing. A healthy organic bed supports a better spinach yield.


Common Mistakes to Avoid

Don’t Let These Ruin Your Spinach Garden

  • Overcrowding: leads to mildew and stunted growth
  • Skipping thinning: seedlings choke each other out
  • Planting too deep: slows germination
  • Using poor soil: affects spacing success and root development

Harvesting Spinach Plant Spacing in a Well-Spaced Garden

Pick More, Grow More

Well-spaced spinach is easier to harvest and grows back quickly.

  • Pick outer leaves first
  • Harvest baby spinach every few days
  • Allow center leaves to keep growing

With succession planting and correct spacing, you can enjoy multiple spinach harvests in one season.


Maximizing Yield in Tight Garden Spaces

Clever Spacing Tricks

  • Interplant spinach with shallow-rooted herbs
  • Use vertical growing methods for taller companions nearby
  • Plant along borders of your raised beds

Space isn’t always about how much you have — it’s about how you use it.


FAQs: Spinach Plant Spacing

Q1: What is the ideal spacing for spinach plants in rows?
A: For mature spinach, space plants about 3–5 inches apart with 12–18 inches between rows to ensure good airflow and healthy leaf development.

Q2: Can I plant spinach close together if I harvest it young?
A: Absolutely! If you’re growing spinach for baby greens, you can sow seeds 2–3 inches apart since the plants will be harvested early before crowding becomes an issue.

Q3: How does plant spacing affect spinach yield?
A: Proper spacing allows each plant to access enough nutrients, sunlight, and air circulation—directly improving yield, flavor, and leaf size in organic gardening.

Q4: Should I thin spinach seedlings after they sprout?
A: Yes, thinning is essential. Once seedlings reach about 2 inches tall, thin them to maintain proper spacing and reduce competition for resources.

Final Thoughts – Spinach Plant Spacing

The way you space your spinach plants has a massive effect on how much you harvest, how healthy your plants are, and how long they thrive. With these spinach plant spacing techniques, you can confidently grow this nutrient-rich green in any garden setup — organically, sustainably, and successfully.

Whether you’re growing in pots, beds, greenhouses, or hydroponics, the rules are simple: give your spinach room to grow, breathe, and thrive. Pair this with great organic gardening practices and you’ll be harvesting delicious, homegrown spinach in no time.

July 22, 2025 0 comments
0 FacebookTwitterPinterestThreadsBlueskyEmail
zucchini plant spacing
Gardening

Zucchini Plant Spacing

by aneeqrauf01@gmail.com July 21, 2025
written by aneeqrauf01@gmail.com

Zucchini Plant Spacing

Zucchini is a favorite summer crop among American home gardeners—and for good reason. It’s easy to grow, highly productive, and perfect for organic gardens. But one often-overlooked key to a thriving zucchini harvest is proper plant spacing. Whether you’re growing zucchini in raised beds, containers, rows, or square-foot gardens, knowing how far apart to plant zucchini can make the difference between a modest yield and a zucchini explosion.

This guide is packed with expert tips and field-tested advice for achieving perfect zucchini plant spacing in any type of garden. From bush zucchini spacing to container gardening and beyond, let’s dig in.


Why Zucchini Plant Spacing Matters

Maximized Yield: Giving plants space helps them grow larger and produce more fruit over the season.

Air Circulation: Proper spacing improves airflow around your plants, reducing the risk of diseases like powdery mildew and downy mildew.

Light Penetration: Well-spaced plants receive more sunlight, enhancing photosynthesis and overall health.

Root Development: Adequate room allows zucchini roots to spread and access water and nutrients efficiently.

Ease of Maintenance: Weeding, watering, pruning, and harvesting become easier when plants are spaced properly.


Know Your Zucchini Plant Spacing Variety Before Spacing

Zucchini plants generally fall into two categories: bush and vining.

Bush Zucchini

Bush zucchini varieties have a compact, mounded growth habit. They are ideal for small spaces, raised beds, and container gardens. Since they don’t spread as far as vining types, they require less room and are more manageable for beginners.

Vining Zucchini

Vining types grow more aggressively and can sprawl across a wide area or be trained up a trellis. Varieties are perfect for gardeners with room to spread out or vertical gardening systems.


General Guidelines for Zucchini Plant Spacing

Understanding the correct zucchini spacing in garden beds or rows is essential. Here’s a guideline for typical spacing needs based on plant type:

Bush Zucchini Spacing

  • Between plants: 24 to 36 inches
  • Between rows: 36 to 48 inches

Vining Zucchini Spacing

  • Between plants: 36 to 48 inches
  • Between rows: 48 to 60 inches or more if letting vines sprawl

Zucchini Plant Spacing in Different Garden Types

Zucchini in Raised Beds

Raised beds are a popular choice for organic gardeners. Their improved drainage and soil quality make them ideal for zucchini.

  • Bush zucchini in raised beds should be planted every 2–3 feet.
  • Vining zucchini should be spaced every 3–4 feet or supported on a trellis to conserve space.

Zucchini in Containers

Growing zucchini in containers is perfect for small spaces like patios or balconies.

  • Use a container of at least 5 gallons with a minimum 18-inch diameter.
  • Only one zucchini plant per container.
  • Space containers 2 to 3 feet apart to ensure good air circulation and access.

Use a high-quality organic potting mix and mulch the top with straw or shredded leaves to retain moisture.

Zucchini in Rows

  • Keep bush plants at 24–36 inches apart in the row.
  • Leave 36–48 inches between rows to walk between and tend the plants.
  • For vining types, widen the rows to 60 inches or more to allow space for the vines to sprawl.

Zucchini Plant Spacing in Square Foot Gardens

Square foot gardening is an efficient method that makes the most of limited space.

  • Bush zucchini requires at least 2 square feet per plant, but ideally 3 or 4.
  • Vining zucchini needs 4–6 squares if trained vertically.
  • Avoid placing zucchini in the center of your grid—it’s better suited for the corner to manage its spread more easily.

Regional Zucchini Plant Spacing Tips by USDA Zone

Different growing zones in the USA may call for slight adjustments in zucchini plant spacing.

3–5 (Northern USA)

  • Use closer spacing to retain warmth.
  • Start plants indoors to get a head start on the short season.

6–7 (Mid-USA)

  • Use standard spacing but monitor for humidity spikes.
  • Prune and thin regularly to avoid fungal issues.

8–10 (Southern USA)

  • Widen spacing to prevent overcrowding and allow better airflow.
  • Mulch heavily to cool the soil and retain moisture.
  • Water early in the morning to avoid heat stress and fungal growth.

Companion Planting and Zucchini Plant Spacing

Great Companions:

  • Marigolds: Deter aphids and squash bugs.
  • Nasturtiums: Trap pests and attract pollinators.
  • Radishes: Grow quickly and act as a ground cover.
  • Beans: Fix nitrogen in the soil, improving soil health.

Poor Companions:

  • Other squashes: Compete for space and share pests.
  • Potatoes: Heavy feeders, compete for nutrients.
  • Corn: Can shade out zucchini and cause overcrowding.

When using companion plants, allow a minimum of 18 inches between zucchini and neighboring crops to reduce competition.


Managing Zucchini Plant Spacing Size with Pruning and Trellising

Even with perfect spacing, zucchini can grow quickly and become overwhelming. Pruning and trellising can help manage the spread and maximize productivity.

How to Prune Zucchini

  • Remove older, yellowing leaves.
  • Cut away any leaves touching the ground to reduce disease risk.
  • Thin out dense foliage to increase airflow and light penetration.

How to Trellis Vining Zucchini

  • Use strong, vertical supports like cages, fences, or stakes.
  • Tie vines loosely with soft ties or fabric strips.
  • Guide the main stem upward early in the growth cycle.

Trellising saves space and reduces the chance of fruit rot from ground contact.

What Happens If You Overcrowd Zucchini Plant Spacing?

Signs of Overcrowding:

  • Small or misshapen fruits
  • Mildew or black spots on leaves
  • Pollination problems
  • Yellowing or curled leaves

Solutions:

Apply compost tea to stimulate health after crowding stress

Thin out early (after first true leaves)

Prune regularly


Watering and Fertilizing Zucchini Plant Spacing

Watering Tips

  • Water deeply and consistently—at least 1 inch per week.
  • Water at the base to avoid wetting leaves.
  • Spacing helps water reach the roots without competition.

Fertilizing Tips

  • Start with rich, composted soil.
  • Top-dress with compost or worm castings monthly.
  • Use organic liquid fertilizers like kelp or fish emulsion every 3–4 weeks.

Wider spacing makes it easier to apply water and nutrients directly to each plant’s root zone without runoff or competition.


Preventing Common Zucchini Problems with Proper Spacing

Proper plant spacing is one of the simplest ways to prevent disease and pest infestations organically.

Diseases Reduced by Spacing

  • Powdery mildew
  • Downy mildew
  • Blossom-end rot (from inconsistent watering in tight soil)
  • Bacterial wilt

Pests Kept Away with Spacing

  • Squash bugs
  • Cucumber beetles
  • Aphids

With good airflow, sunlight penetration, and ease of inspection, spacing gives you the best chance to stay ahead of these common zucchini threats.


Rotating Zucchini Plant Spacing Over the Seasons

Zucchini belongs to the cucurbit family. You should rotate it every year to a new location in your garden to avoid soil-borne diseases and pest buildup.

  • Don’t plant zucchini in the same spot for at least 2–3 years.
  • Replace it with legumes, leafy greens, or root crops during off-years.

Spacing crops in a rotation plan helps maintain healthy garden ecosystems and reduces long-term problems.


Common Mistakes in Zucchini Plant Spacing

Avoid these pitfalls:

Overcrowding: Leads to poor air circulation and smaller fruit

Under-spacing in containers: One plant per container rule is critical

Ignoring variety type: Bush vs. vine spacing needs are very different

Best Practices for Zucchini Plant Spacing in Organic Gardens

Know your variety – spacing differs between bush and vining types

Airflow is essential – always lean toward wider spacing

Use mulch and compost – improve soil and reduce competition

Adjust by climate – hot and humid regions need more space

Stick to one plant per container – no exceptions!

Tips for Adjusting Zucchini Plant Spacing in Real-Time

Even with planning, sometimes zucchini spacing needs to be adjusted after planting.

  • Thin seedlings early if more than one sprouted per spot.
  • Prune large plants weekly to reduce overcrowding.
  • Harvest fruits early and often to keep growth under control.

FAQs:

How far apart should I plant zucchini in a container?

Only one plant per large container (minimum 5 gallons). Place containers 2 to 3 feet apart for best results.

Can zucchini be planted next to tomatoes?

Yes, but space them at least 24–30 inches apart. Both need sun and airflow, so avoid crowding.

Can I grow zucchini 12 inches apart?

That’s too close for mature plants. Minimum spacing should be 24 inches for bush types, and even more for vining.

What if I already planted too close?

Thin your seedlings or transplant them. Prune to control growth. Overcrowding will affect yield and encourage disease.


Final Thoughts: Zucchini Plant Spacing

Growing healthy, organic zucchini doesn’t require magic—it just requires space. When you understand how far apart to plant zucchini, you unlock the full potential of this prolific summer crop. Whether in rows, raised beds, or containers, proper spacing leads to stronger plants, bigger yields, and fewer problems.

So when in doubt, space it out. Your zucchini—and your future recipes—will thank you.

July 21, 2025 0 comments
0 FacebookTwitterPinterestThreadsBlueskyEmail
onion plant spacing
Gardening

Onion Plant Spacing

by aneeqrauf01@gmail.com July 21, 2025
written by aneeqrauf01@gmail.com

Onion Plant Spacing

Introduction: Why Onion Plant Spacing Deserves Your Attention

When it comes to growing onions organically, one simple factor can determine whether you harvest large, healthy bulbs—or a patch of undersized, disease-prone disappointments. That factor is onion plant spacing.

Plant spacing isn’t just about how far apart your onions sit in the soil. It’s about ensuring:

  • Each plant receives enough sunlight and nutrients
  • Proper airflow prevents fungal and bacterial issues
  • You get the maximum yield for your garden space

This in-depth guide is tailored for organic gardeners in the USA who want to grow onions successfully in raised beds, containers, or in-ground gardens. Whether you’re cultivating onions from seeds, sets, or transplants, we’ll walk you through best practices for spacing, regional considerations, and expert tips.

Let’s dig in—literally and figuratively.

Why Onion Plant Spacing Matters in Organic Gardening

Spacing isn’t just about giving onions room to grow—it’s about setting the stage for success. In organic gardens, healthy plants rely on good airflow, access to nutrients, and strategic planting. Overcrowded onions are prone to:

  • Fungal diseases like downy mildew or neck rot
  • Undersized bulbs
  • Competition for nutrients
  • Increased pest issues

Understanding the Nature of Onion Plant Spacing

Before we talk about spacing, it’s important to understand how onions grow. Onions belong to the Allium family, which also includes garlic, shallots, and leeks. Onions are shallow-rooted plants that form either bulbs or long green stalks depending on the variety. These characteristics make soil type, sunlight exposure, and spacing absolutely critical.

Why Spacing Affects Onion Growth

Spacing influences nearly every aspect of onion development:

  • Bulb Formation: Crowded onions can’t swell properly
  • Disease Resistance: Overcrowding leads to rot and mildew
  • Photosynthesis: Leaves compete for light if too close
  • Harvest Quality: Spaced onions mature uniformly

Proper spacing reduces the need for interventions.


Factors That Influence Onion Plant Spacing

Variety of Onion

Different types of onions require different spacing strategies.

  • Bulb onions like yellow, red, and white varieties need more room (typically 4–6 inches apart) to allow for full bulb development.
  • Green onions or scallions can be spaced closer together—usually 2–3 inches apart—since we harvest them before bulbs form.
  • Spring onions (mild onions harvested early) usually fall in between, with a suggested spacing of 3–4 inches.

Method of Planting

  • Seeds: These are sown closely at first, then thinned out to the appropriate spacing as they grow.
  • Sets: Small immature bulbs that require consistent 4–6 inch spacing right from planting.
  • Transplants: Start indoors or bought as seedlings, they also need 4–6 inch spacing when transplanted into the garden.

Soil Conditions

Loose, well-draining, fertile soil helps roots expand easily. In heavier soils, you may want to increase spacing slightly to avoid waterlogging and disease.

Sunlight & Water Availability

Onions need full sun and even moisture, both of which are better managed with appropriate spacing. Poorly spaced onions are more susceptible to bolting (premature flowering), reduced size, and fungal infections.


Regional Spacing Tips for USA Gardeners

Let’s break it down by region.

Northern USA (Zones 3–5)

  • Shorter growing seasons mean timing is crucial.
  • Use indoor seed starting and transplant them into raised beds.
  • Mulch to retain heat and increase spacing slightly (6–8 inches) for better airflow.

Midwest & Northeast (Zones 6–7)

  • Spring planting is ideal.
  • Stick to standard spacing (4–6 inches).
  • Make sure rows are 12–18 inches apart to allow room for weeding and watering.

Southern USA (Zones 8–11)

  • You can plant in late fall or early winter for spring harvests.
  • Choose heat-tolerant and disease-resistant varieties for best results.

Step-by-Step Guide to Onion Plant Spacing Correctly

Step 1: Prepare Your Bed

Onions thrive in light, fluffy soil. Add compost, aged manure, or an organic vegetable fertilizer high in phosphorus and potassium to encourage root and bulb growth.

Step 2: Mark the Spacing

Use a string line or measuring stick to create straight rows. This helps you evenly space each onion, whether you’re growing in raised beds, containers, or traditional garden plots.

Step 3: Place Each Onion

  • For bulb onions, plant or thin to 4–6 inches apart.
  • For green onions, space them 2–3 inches apart.
  • For spring onions, use 3–4 inches of space.

Rows should be spaced 12–18 inches apart to allow for airflow, weeding, and watering access.


Onion Plant Spacing in Raised Beds

Raised beds offer excellent drainage and soil control, making them ideal for onions.

  • You can plant onions in grid formation instead of rows.
  • Use 4-inch spacing in a staggered pattern for maximum yield.

Tips for Raised Beds:

  • Use light compost-rich soil.
  • Avoid planting too close to the edges where soil dries out faster.
  • Ensure at least 12 inches of bed depth.

Onion Plant Spacing in Containers

Container gardening is great for small spaces. Onions grow surprisingly well in pots, provided you follow spacing rules.

  • Use a container at least 10 inches deep.
  • Plant onions 4 inches apart for bulbs, 2–3 inches for green onions.
  • Choose wide containers to avoid overcrowding.

Best Varieties for Containers:

  • White Lisbon
  • Evergreen Bunching
  • Cipollini

Spacing and Companion Planting

You can boost your onion yield and reduce pests with companion planting. Onions grow well with:

  • Carrots: Help repel onion flies.
  • Lettuce: Grows quickly and won’t compete for space.
  • Beets: Also shallow-rooted and compatible in spacing.

Avoid planting onions near:

  • Beans or peas (they inhibit onion growth)
  • Sage (can attract thrips)

How Spacing Prevents Common Onion Pests and Diseases

Overcrowded onions are magnets for pests and fungi. With proper spacing, you reduce:

Common Onion Plant Spacing Issues:

  • Onion maggots: Thrive in damp, tight plantings.
  • Downy mildew: Spread rapidly when airflow is restricted.
  • Thrips: Prefer hiding in dense leaf clusters.

Organic Solutions:

  • Space properly to ensure good airflow.
  • Spray neem oil or garlic tea weekly.
  • Rotate crops and never plant onions in the same space two years in a row.

How Onion Plant Spacing Influences Bulb Size and Sunlight Access

Sunlight exposure is critical. Each onion needs at least 6 hours of sun. If leaves are shaded due to tight spacing, photosynthesis is reduced, and bulbs won’t grow large.

  • The more space between plants, the larger the potential bulbs—but only up to a point.
  • Excess spacing in rich soil may lead to weeds filling the gaps.

Timing and Spacing: Succession Planting Onions

Want a continuous harvest?

  • Succession plant scallions every 2–3 weeks.
  • Use close spacing (1–2 inches) for early greens.
  • Thin out every other plant later for bulb harvest.

Crop Rotation and Onion Plant Spacing Impact

Don’t underestimate the impact of rotating crops and spacing:

  • Onion beds should rotate every season.
  • Don’t follow onions with garlic, shallots, or leeks.
  • Rotate with nitrogen-fixing plants like beans or legumes to replenish soil.

Proper spacing supports healthier rotation by reducing nutrient drain and compaction.


Real Examples from Organic Gardeners

Case Study 1: Raised Beds in Colorado

A gardener in USDA Zone 5 spaced red onions 6 inches apart in compost-rich soil. They mulched with straw and added bone meal at planting. The result? Bulbs the size of softballs with no sign of rot.

Case Study 2: Containers in Florida

A container gardener in USDA Zone 9 used 5-gallon pots for green onions, planting them 3 inches apart. Using a homemade neem spray, they had no pest problems and harvested fresh scallions weekly.


Organic Practices to Support Onion Plant Spacing Success

Drip irrigation to avoid fungal issues from wet foliage

Mulch to conserve moisture and suppress weeds

Compost to feed onions slowly and organically

Hand-weed to avoid disturbing shallow roots

Common Mistakes in Onion Plant Spacing

Planting too close: Stunts bulb growth and increases disease

Not thinning seedlings: If starting from seed, thin to proper spacing

Forgetting row spacing: Rows need space for weeding and airflow

FAQs: About Onion Plant Spacing

Should I change spacing for poor soil?

Yes. Poor soil requires slightly more spacing—6–8 inches—to reduce competition for nutrients.

Can I grow onions close together and just thin them later?

Absolutely. This is common when starting from seed. Sow densely, then thin to proper spacing once the seedlings are established.

How deep do I plant onions?

Just deep enough to cover the roots or base of the bulb. Over-burying can lead to rot or poor growth.

Should I mulch between onions?

Yes, but keep mulch 1 inch away from the necks of onions. Mulching helps retain moisture and suppress weeds.


Final Thoughts: Onion Plant Spacing

In organic gardening, spacing is not just a technical step—it’s part of your strategy. By applying the right onion plant spacing, you allow your crop to thrive naturally without the need for artificial boosters or pesticides. Spaced onions grow bigger, resist disease better, and offer an easier harvest.

From containers to raised beds and every garden in between, this spacing guide helps you grow onions like a pro. Stick to the principles, tweak based on your zone, and enjoy the satisfaction of pulling full, flavorful bulbs from your soil.

July 21, 2025 0 comments
0 FacebookTwitterPinterestThreadsBlueskyEmail
spacing for tomato plants
Gardening

Spacing For Tomato Plants

by aneeqrauf01@gmail.com July 21, 2025
written by aneeqrauf01@gmail.com

Spacing for Tomato Plants

Introduction: Why Spacing For Tomato Plants Matters

When it comes to growing juicy, healthy, and productive tomato plants, spacing for tomato plants is one of the most critical – yet often overlooked – factors. Whether you’re planting in containers on your patio, laying out rows in raised beds, or managing an organic backyard garden, getting the spacing right can make all the difference.

From preventing disease to maximizing airflow and sunlight, understanding how far apart to plant tomatoes helps ensure a healthy harvest and supports your overall organic gardening goals.

In this article, you’ll discover the best practices for tomato plant spacing in different settings, explore spacing needs for different tomato types, and learn how spacing impacts yield, health, and growth.


Know Your Spacing For Tomato Plants Types

Determinate Tomatoes (Bush Types)

Determinate tomato plants grow to a fixed height and produce most of their fruit within a short period. Because of their compact growth, they can be spaced more closely than other types. In organic gardens, it’s best to leave at least 18 to 24 inches between determinate tomato plants to allow their branches to grow freely while ensuring proper airflow.

Indeterminate Tomatoes (Vining Types)

Indeterminate tomatoes grow continuously and produce fruit all season long. These tall and sprawling plants require staking or trellising. To accommodate their size, spacing of 24 to 36 inches between plants is ideal.

Cherry and Grape Tomatoes

These smaller tomato types are vigorous growers, especially the indeterminate varieties. Although their fruit is small, the plant size can be large.

Heirloom Tomatoes

Often indeterminate and more sensitive to disease, heirloom tomatoes benefit from ample space—usually 24 to 36 inches per plant—to reduce the risk of fungal issues and allow airflow around their typically larger foliage.


Container Gardening: Spacing For Tomato Plants in Pots and Buckets

Container gardening is extremely popular in urban environments. You can grow juicy, ripe tomatoes on a balcony, patio, or rooftop.

Key Tips for Tomato Container Spacing:

  • Each tomato plant should have its own pot, at least 5 gallons in size.
  • Leave 24 to 30 inches between containers to allow airflow.
  • Don’t crowd containers together under the same trellis or cage — even in containers, tomato plants need breathing room.

Organic Tip:

Use organic-rich potting soil, and don’t forget to mulch the top of your containers to reduce evaporation and suppress weeds.


Spacing For Tomato Plants in Raised Beds

Raised beds offer great control over your soil health and drainage, especially important in organic gardening. The deeper and loamier your raised bed soil is, the more your tomatoes can spread their roots.

Best Practices for Raised Bed Spacing:

  • In a 4-foot-wide raised bed, plant one row of indeterminate tomatoes down the center, or two staggered rows of bush (determinate) varieties.
  • Keep at least 24 to 30 inches between indeterminate tomatoes.

Traditional In-Ground Garden Rows

For gardeners with ample space, planting tomatoes in traditional rows can be very effective.

Row Spacing Tips:

  • Space tomato plants 24 to 36 inches apart, depending on the variety.
  • Keep 3 to 5 feet between rows for easier weeding, watering, and harvesting.

Square Foot Gardening and Spacing For Tomato Plants

Square foot gardening offers an efficient layout for small-space gardeners. Here’s how to space your tomato plants within that framework:

Spacing Guide (per square foot block)

  • Determinate tomatoes: 1 plant per 4 square feet
  • Indeterminate tomatoes: 1 plant per 9 square feet with vertical support

Spacing For Tomato Plants by Growth Stage

Seedling Stage (0–4 weeks)

  • Space 2–3 inches apart in trays or propagation pots

Transplant Stage (4–6 weeks)

  • Begin setting final spacing of 18–36 inches depending on type

Fruiting Stage (8+ weeks)

Ensure plants have at least 2–3 ft between foliage edges for airflow


Why Spacing For Tomato Plants Matters for Sunlight and Airflow

Tomatoes love the sun — ideally 6 to 10 hours of direct sunlight daily. This can:

  • Encourage diseases like early blight or powdery mildew
  • Increase the chance of pest infestations

Spacing your tomatoes properly lets sunlight hit every leaf and promotes natural drying after rainfall or watering.


Soil and Mulching Considerations for Optimal Spacing For Tomato Plants

When you use organic mulch like straw, shredded leaves, or compost, you can help maintain moisture and reduce disease pressure.

Organic Gardening Tip:

Space plants slightly wider (2–4 inches more) when using mulch to ensure that extra insulation doesn’t trap moisture around stems.


Companion Planting and Spacing For Tomato Plants Synergy

Best Companion Plants:

  • Basil: Improves tomato flavor and repels pests
  • Marigolds: Deter nematodes and aphids
  • Garlic and Onions: Help reduce fungal spores in soil

Keep companion plants 6–12 inches away from tomato stems to prevent root crowding.


Preventing Disease Organically with Proper Spacing For Tomato Plants

One of the most powerful natural defenses against disease in tomato plants is adequate spacing.

Common Diseases Caused by Overcrowding:

  • Early Blight
  • Septoria Leaf Spot
  • Bacterial Speck
  • Fusarium Wilt

Prevention Tips:

  • Allow room between leaves and between plants
  • Prune lower leaves that touch the soil
  • Maintain plant spacing to improve airflow and sunlight penetration

Spacing For Tomato Plants Based on USDA Gardening Zones

In the USA, gardening conditions vary widely based on USDA hardiness zones. Your zone affects how fast tomatoes grow and how far apart they should be.

3–5 (Cool Climates):

  • Shorter growing season means slower growth, so closer spacing (18–24 inches) is okay
  • Use black plastic mulch to warm the soil

6–7 (Mild Climates):

  • Use standard spacing of 24–36 inches
  • Choose disease-resistant varieties if you have high humidity

8–11 (Warm to Hot Climates):

  • Tomato plants grow faster and larger
  • Space plants 30–48 inches apart

Greenhouse & Hydroponic Spacing For Tomato Plants

In controlled environments:

Greenhouses

  • Hydroponic spacing: 10–18 inches (plants are vertically pruned)
  • Use overhead trellis systems
  • Prune weekly for spacing management

Hydroponics

Use net cups in staggered rows for airflow

Nutrient-dense solution allows tighter spacing


Vertical Gardening and Trellising Spacing For Tomato Plants

Training your tomato plants to grow vertically is a great way to save space while maximizing yield.

Trellising Tips:

  • Stake or cage tomatoes immediately after transplanting
  • Prune suckers weekly to prevent bushy growth
  • Tie stems loosely using cloth or twine to allow for stem expansion

Common Mistakes Gardeners Make with Spacing For Tomato Plants

Even experienced gardeners fall into spacing traps. Avoid these:

  1. Crowding for more yield
    • The opposite usually happens — less airflow = fewer tomatoes.
  2. No airflow under leaves
    • Leads to disease and pest problems.
  3. Compacted spacing in containers
    • Don’t cluster pots or let trellises intertwine.

Spacing For Tomato Plants and Root Development

Tomato roots spread widely and deeply.

  • Roots develop strong support systems
  • Plants uptake nutrients more efficiently
  • Water retention is improved

Planting Calendar and Spacing Tips by Month

March–April (South & West USA):

  • Start seeds indoors or plant outside in frost-free areas
  • Space indeterminate starts 30–36 inches apart

May–June (North & Midwest USA):

  • Ideal transplant time
  • Add extra space for bushier heirlooms

July–August (Hot Zones or Fall Tomatoes):

  • Wider spacing prevents heat stress
  • Use deep mulch and water roots early in the day

How Spacing For Tomato Plants Impacts Harvest and Pruning

Proper spacing makes everything easier:

  • Harvesting: You can move freely between plants
  • Pruning: Better visibility and access
  • Staking and Tying: Cages don’t overlap
  • Fruit Quality: Reduced pest and disease risk leads to healthier fruit

FAQ: Spacing For Tomato Plants in Organic Gardening

Q1: Can I plant two tomato plants together?

No — even if the hole is large, the roots will compete. Space each plant independently.

Q2: Can I grow tomatoes closer if I prune them?

Yes, with proper vertical training and pruning, you can plant 18–24 inches apart.

Q3: What happens if I plant tomatoes too close?

You’ll get:

  • Yellowing lower leaves
  • Powdery mildew
  • Fewer, smaller fruits
  • More pests like aphids and hornworms

Q4: Is it okay to mix tomato types?

Yes — but match spacing to the largest plant’s needs.

Q5: How close can I plant tomatoes in a greenhouse?

With hydroponic or vertical growing, spacing can be 12–18 inches, as long as airflow and pruning are managed carefully.


Final Thoughts: Spacing For Tomato Plants

Proper spacing for tomato plants is not just about avoiding crowding – it’s a powerful way to boost yield, fight disease naturally, and create a thriving organic garden. Whether you’re working in containers, raised beds, or garden rows, giving your tomatoes enough room is a small decision that delivers big rewards.

By applying these spacing guidelines, USA gardeners can enjoy healthy plants, better harvests, and fewer headaches.

July 21, 2025 0 comments
0 FacebookTwitterPinterestThreadsBlueskyEmail
spacing plants
Gardening

Spacing Plants

by aneeqrauf01@gmail.com July 21, 2025
written by aneeqrauf01@gmail.com

Spacing Plants

Introduction: Why Spacing Plants Matters in Organic Gardening

When it comes to a thriving organic garden, spacing plants properly is just as important as soil quality, watering, or sunlight. Whether you’re growing vegetables in a raised bed or planting native wildflowers in your backyard, understanding how far apart to space each plant can make or break your harvest.

Proper plant spacing helps:

  • Improve air circulation
  • Reduce pest and disease pressure
  • Maximize sunlight and root development
  • Enhance yield and plant health

In this guide, we’ll explore everything a home gardener needs to know about plant spacing in organic gardens, including spacing charts, layout tips, tools, and best practices by plant type and garden style.


What Is Spacing Plants?

Plant spacing refers to the intentional distance you leave between plants in a garden. This includes:

  • Intra-row spacing (the space between plants within a row)
  • Inter-row spacing (the space between rows)

The Science Behind Proper Spacing Plants

What Happens When You Overcrowd Plants?

Overcrowding plants leads to:

  • Poor airflow, encouraging fungal diseases
  • Root competition, which stunts growth
  • Shaded leaves, reducing photosynthesis

In organic gardening—where chemicals aren’t used—prevention is key, and proper spacing is a powerful preventive measure.

Underplanting: Is Too Much Space a Problem?

Yes!

  • Waste garden space
  • Dry out soil faster
  • Encourage weeds to grow

Balance is essential.


Why Is Spacing Plants Important in Organic Gardening?

Proper spacing leads to:

  • Stronger root development
  • Improved airflow, reducing diseases like powdery mildew and blight
  • Better sunlight penetration
  • Efficient use of soil nutrients
  • Easier harvesting and maintenance
  • Enhanced pest control through natural airflow and diversity

Overcrowding creates stress and leads to unhealthy plants, making them more vulnerable to pests and diseases. Well-spaced plants are healthier, more resilient, and more productive.


Factors That Affect Spacing Plants

1. Plant Size and Growth Habit

Each plant species has a natural size and growth pattern. Sprawling plants like squash or pumpkins need several feet of space, while compact crops like radishes or lettuce can be planted closer together.

  • Bush plants (like bush beans or compact tomatoes) require moderate space.
  • Vining or indeterminate plants (like pole beans or vining tomatoes) need trellising and extra room to climb and spread.

2. Planting Method and Garden Type

Raised beds, in-ground rows, containers, and square-foot gardens each have different spacing strategies.

  • In raised beds, spacing can be tighter due to improved drainage and soil.
  • In-ground planting requires more room for root spread and equipment access.
  • In containers, spacing is limited by pot size, so choose plants with smaller root systems.

3. Climate and Airflow

In humid climates, plants need more space to allow proper air circulation and prevent fungal diseases. In drier regions, spacing may be slightly tighter to retain soil moisture.

If you’re gardening in areas with heavy rainfall or warm, muggy summers (like parts of the Southeast or Midwest), prioritize airflow by giving plants extra breathing room.

4. Sunlight and Shade Tolerance

Some plants are sun lovers (tomatoes, peppers, corn), while others tolerate or prefer partial shade (lettuce, spinach, kale). Don’t crowd sun-loving plants, or they’ll struggle to thrive. Shadier crops can often be grown in tighter clusters.

Also, avoid placing tall crops where they’ll cast shade on shorter plants. Strategic spacing helps ensure that all plants receive the light they need.


General Guidelines for Spacing Plants Common Garden Plants

Although we won’t use tables here, let’s go over common spacing ranges by plant type. These ranges apply to most organic gardens in USDA zones 3–10, with adjustments based on your microclimate and garden design.

Leafy Greens

  • Lettuce: Thin to 8–10 inches apart.
  • Spinach: Thin to 6 inches apart in rows about 12 inches apart.
  • Kale and collards: Space plants 12–18 inches apart with rows 18–24 inches apart.

Root Vegetables

  • Carrots: Plant 2 inches apart and thin if needed.
  • Beets: Space 3–4 inches apart; give 12–18 inches between rows.
  • Radishes: Space 2–3 inches apart and harvest frequently to allow space for others.

Fruiting Vegetables

  • Tomatoes: Bush varieties need 18–24 inches; vining types need 24–36 inches or more.
  • Peppers: Space about 18–24 inches apart.
  • Squash and Zucchini: These need a lot of space—at least 36–48 inches per plant.

Legumes

  • Bush beans: Space 4–6 inches apart.
  • Pole beans: Plant 6 inches apart along a trellis or pole.

Corn

  • Space corn plants 10–12 inches apart with rows 30–36 inches apart to allow for pollination.

Herbs

  • Basil: Plant 12–18 inches apart.
  • Thyme and oregano: Give 6–12 inches between plants.
  • Rosemary: Space 24–36 inches apart as it becomes a woody shrub.

Flowers

  • Marigolds: Plant 8–12 inches apart.
  • Zinnias: Give 10–12 inches between plants.
  • Sunflowers: Depending on variety, 12–24 inches is ideal.

Spacing Plants Strategies for Different Garden Types

Raised Bed Gardening

In raised beds, because of better soil quality and structure, plants can be grown a little closer than traditional row planting. However, don’t go overboard. You still need:

  • Good air circulation
  • Room for roots
  • Space to access each plant for watering and harvesting

Leave at least 12–18 inches between large plants and allow 12-inch walkways or stepping areas between dense plantings.

In-Ground Rows

For larger properties or traditional setups, in-ground rows provide the most flexibility for rotating crops and using tools. Use:

  • Wider spacing for easier weeding and walking
  • Crop-specific row spacing to prevent overlap

For example, corn and tomatoes in open ground need at least 36 inches between rows to allow airflow and movement.

Square Foot Gardening

This method is popular for urban and small-space gardeners. Divide your bed into 12” x 12” grids. Follow plant-by-plant guidelines:

  • One tomato per square foot
  • Four lettuces per square foot
  • 16 carrots or radishes per square foot

This strategy works well in raised beds and ensures every inch of soil is utilized effectively without overcrowding.

Container Gardening

Container spacing depends on:

  • Container size
  • Root depth
  • Light availability

Avoid planting multiple large crops in small pots. Choose compact varieties for better yields in tight spaces. Add spacing between containers to allow air and light to reach all sides.


Seasonal Spacing Plants Adjustments

Spring Gardening

In early spring, cooler temperatures and damp soil mean plants can be spaced a little closer. Leafy greens like lettuce or spinach won’t overheat and won’t need as much airflow as they would in summer.

Summer Gardening

In summer, spacing becomes more important. Plants need more airflow to combat fungal issues like powdery mildew or early blight. For heat-loving crops, wider spacing helps reduce stress and keeps soil temperatures from rising too high.

Fall Planting

For fall, consider interplanting quick-growing crops with slower ones. For example, plant radishes between rows of carrots. The radishes mature quickly and can be harvested before the carrots grow large enough to need the space.


Native Plant and Pollinator Garden Spacing Plants

Spacing native perennials in a pollinator garden depends on regional needs and species behavior.

Native wildflowers like echinacea, bee balm, and black-eyed Susan should be spaced at least 18–24 inches apart. This allows pollinators easy access to blooms and prevents plants from becoming overly competitive.

Crowding native plants can reduce bloom time, increase competition for nutrients, and limit biodiversity. Well-spaced native plants create an open, welcoming habitat for butterflies, bees, and birds.


Common Spacing Mistakes to Avoid

  1. Crowding Seedlings: It’s easy to overplant in early stages.
  2. Ignoring Mature Plant Size: A tiny seedling may grow into a 3-foot-wide bush.
  3. Inconsistent Spacing: Spacing errors lead to uneven growth and competition for light.
  4. No Thinning or Succession Planting: Keep spacing optimized by harvesting and replanting in waves.

Using Tools and Techniques for Accurate Spacing Plants

Use these spacing aids:

  • Garden twine and stakes to mark rows
  • Measuring sticks for even spacing
  • Spacing templates made from cardboard or wood
  • Digital garden planners for square-foot or container layouts

(FAQ): About Spacing Plants

Q1: What is the best way to measure plant spacing?

A: Use a yardstick, plant spacing template, or grid layout for consistency.

Q2: How does plant spacing affect yields?

A: Proper spacing increases yield by promoting healthier, stronger plants.

Q3: Can I adjust spacing based on garden type?

A: Yes, raised beds allow slightly closer spacing due to better drainage and soil health.

Q4: Should I thin my plants after they sprout?

A: Definitely. Thinning is essential to avoid overcrowding during early growth.

Final Thoughts: Spacing Plants

Plant spacing isn’t just about order—it’s about health, productivity, and resilience. Whether you’re growing a single raised bed or managing a full backyard homestead, proper spacing makes the difference between average and abundant.

By following spacing principles and adjusting based on season, region, and garden type, you’ll enjoy:

  • Bigger harvests
  • Fewer pests
  • Healthier soil
  • Happier plants
July 21, 2025 0 comments
0 FacebookTwitterPinterestThreadsBlueskyEmail
shade gardens ideas
Gardening

Shade Gardens Ideas

by aneeqrauf01@gmail.com July 19, 2025
written by aneeqrauf01@gmail.com

Shade Gardens Ideas


Introduction: Shade Gardens Ideas

Not every garden needs full sun to thrive. In fact, some of the most tranquil and lush landscapes are born in the shade. Whether you’re working with the cool side of your home, a tree-covered backyard, or a narrow side yard with limited light, Shade Gardens Ideas offers a world of creative and rewarding possibilities.

For organic gardeners across the USA, shady areas are more than just obstacles—they’re opportunities to grow uniquely beautiful plants, encourage biodiversity, and design peaceful retreats. With the right planning, plant selection, and sustainable techniques, you can transform dim corners into vibrant, living ecosystems that align with your values and your climate.

In this article, you’ll explore a wide range of shade garden ideas—from layout inspiration and design tips to the best native and organic shade-loving plants. Whether you’re in USDA Zone 4 or Zone 9, we’ll help you make the most of every shady spot in your yard using smart, eco-friendly practices.


Understanding Shade in Your Garden

Before you choose plants or plan your layout, it’s essential to know what kind of shade you’re working with.

Types of Shade:

  • Full Shade – Areas that receive less than 3 hours of direct sun per day.
  • Partial Shade – Areas that get 3–6 hours of direct or filtered sunlight.
  • Dappled Shade – Sunlight filtered through trees or lattice, creating spots of light.
  • Deep Shade – Completely shaded areas, often next to walls or beneath thick canopies.

Each type affects what you can grow, how soil behaves, and how much water is retained. Identifying your light levels helps you select plants that will thrive organically without artificial inputs.


Benefits of Shade Gardens Ideas in Organic Systems

Many gardeners view shade as a limitation, but in organic gardening, shade offers powerful advantages:

  • Water Conservation: Less sun means lower evaporation rates.
  • Weed Suppression: Dense plantings in shade discourage weed growth.
  • Cooler Soil: Encourages microbial activity and reduces plant stress.
  • Biodiversity: Supports insects, fungi, mosses, and shade-adapted wildlife.

These natural advantages align perfectly with sustainable gardening goals.

Planning Your Shade Gardens Ideas Layout

Evaluate Your Space

Start by observing how much sunlight your area gets throughout the day. Note tree cover, structures, and soil type.

Design Tips:

  • Use curving pathways made of natural materials like mulch or flagstone
  • Create layered planting with tall shrubs, mid-level perennials, and ground covers
  • Incorporate focal points like birdbaths or shade-tolerant container gardens
  • Emphasize textures and leaf shapes over blooms

Small Space Shade Garden Ideas:

Add hanging baskets with trailing shade plants like ivy or torenia

Use vertical planters for climbing vines

Place pots of shade-friendly herbs like mint and parsley on shaded patios

Planning a Shade Gardens Ideas Step-by-Step

Step-by-Step Process:

Maintain regularly — prune, refresh mulch, feed with compost tea

Survey the area — measure light, soil, and existing plants

Sketch the layout — include paths, structures, borders

Set your theme — woodland, edible, tropical, minimalist

Build layers — trees, shrubs, perennials, groundcovers

Amend soil organically — compost, leaf mold, worm castings

Add mulch to retain moisture and prevent weeds

Water smartly — drip or deep watering


Soil Preparation in Shaded Areas

Shaded areas often have dry, compacted soil due to tree roots and lack of organic material. Here’s how to naturally improve it:

  • Loosen Soil: Use a broadfork or garden fork to aerate the bed.
  • Add Organic Matter: Work in compost, leaf mold, or worm castings.
  • Retain Moisture: Mulch with wood chips, shredded leaves, or bark to prevent drying out.
  • Test Drainage: Shaded beds may have poor drainage—improve it with compost or sand.

Healthy soil is the foundation of every successful shade garden, especially when you’re avoiding synthetic fertilizers or chemical soil amendments.


Best Shade Gardens Ideas-Loving Plants for Organic Gardens

Shade-Tolerant Perennials:

Perennials come back each year, making them ideal for low-maintenance shady areas.

  • Hostas – Known for their wide leaves and tolerance for deep shade.
  • Astilbe – Produces colorful plumes and loves moisture.
  • Toad Lily (Tricyrtis) – Blooms with orchid-like flowers in late summer.
  • Hellebore (Lenten Rose) – Evergreen with early-spring blooms.
  • Coral Bells (Heuchera) – Bright foliage even in deep shade.

Shade-Loving Annuals:

These plants complete their lifecycle in one season but bring bursts of color.

  • Impatiens – A classic choice with non-stop blooming in shade.
  • Coleus – Adds vibrant leaf color in reds, purples, and chartreuse.
  • Torenia – Also known as wishbone flower, it thrives in dappled light.
  • Begonia – Gorgeous foliage and colorful blooms.

Groundcovers for Shade:

These plants suppress weeds, fill gaps, and add texture.

  • Sweet Woodruff – Fragrant, low-growing herb with star-shaped leaves.
  • Lamium – Fast-growing with silver variegated leaves.
  • Ajuga (Bugleweed) – Spreads quickly and blooms with purple spikes.
  • Wild Ginger – Native and excellent for dry shade.

Native Shade Gardens Ideas Plants by Region

Choosing native plants for shady areas ensures long-term success and supports pollinators and wildlife.

Eastern USA:

  • Foamflower (Tiarella cordifolia)
  • Eastern Columbine (Aquilegia canadensis)
  • Bloodroot (Sanguinaria canadensis)

Midwest:

  • Wild Geranium
  • Solomon’s Seal
  • Woodland Phlox

Southeast:

  • Oakleaf Hydrangea
  • Carolina Jessamine
  • Southern Shield Fern

Pacific Northwest:

  • Redwood Sorrel
  • Western Bleeding Heart
  • Oregon Grape (Mahonia aquifolium)

These natives are well adapted to shade and thrive without synthetic fertilizers or pesticides.


Matching Plants to USDA Zones

To avoid failed plantings, always choose species suited to your USDA hardiness zone.

3–5:

  • Hellebores
  • Hostas
  • Trillium
  • Lady Fern

6–7:

  • Bleeding Heart
  • Toad Lily
  • Foamflower

8–10:

  • Cast Iron Plant
  • Caladium
  • Coleus
  • Ferns

Matching plant hardiness to your local climate is a cornerstone of organic shade gardening success.


Container Shade Gardens Ideas

Not everyone has in-ground space. Container gardening in shady patios, porches, or balconies is a flexible alternative.

Tips for Shade Gardens Ideas Containers:

  • Use moisture-retentive soil mixes (with compost and coconut coir).
  • Choose compact, shade-tolerant varieties.
  • Mix textures—grassy, leafy, and flowering plants.
  • Add trailing plants like English ivy or sweet potato vine.

Popular combos: coleus + impatiens + fern in a terracotta pot = low-light visual appeal!


Edible Plants That Grow in Shade Gardens Ideas

Yes, you can grow food in shade!

Leafy Greens:

  • Lettuce
  • Spinach
  • Arugula
  • Swiss Chard

Herbs:

  • Mint
  • Parsley
  • Cilantro
  • Chives

Fruits:

  • Blackberries
  • Currants
  • Raspberries
  • Gooseberries

These options grow in partial to dappled shade—great for small organic growers looking to harvest food without full sun.


Design Principles for Beautiful Shade Gardens Ideas

Shade gardens offer a peaceful, textural experience. Here’s how to maximize beauty:

Layering:

Use a three-layer design:

  • Tall plants in the back
  • Mid-height fillers in the center
  • Groundcovers up front

Texture:

Mix leaf types—bold hostas, fine ferns, and delicate flowers create visual interest.

Foliage Color:

In shade, foliage takes center stage. Combine greens, purples, silvers, and variegation to add drama.

Curved Paths:

A winding path draws the eye and leads visitors through shady spaces.


Decor & Hardscaping Ideas for Shade Gardens

Shade gardens are perfect places for outdoor decor and natural hardscape elements.

  • Moss-covered stepping stones
  • Wood or bamboo trellises
  • Birdbaths in tree-filtered light
  • Sculptures or garden gnomes
  • Log or stone benches

Natural materials blend seamlessly with the softness of shade-loving plants.


Organic Pest & Weed Control for Shaded Spaces

Shade gardens may suffer less from pests, but some still appear—especially slugs, snails, and mildew.

Natural Pest Control:

  • Beer traps or crushed eggshells for slugs
  • Neem oil spray for fungal issues
  • Diatomaceous earth under mulch
  • Encourage frogs, birds, and ladybugs

Weed Management:

  • Apply thick mulch layers
  • Fill gaps with groundcovers
  • Hand-pull before seed set

Avoid synthetic herbicides. Mulch and plant density are your best organic defenses.


Watering Strategies for Shade Gardens Ideas

Shade gardens don’t need frequent watering, but don’t ignore them either.

  • Water deeply, less often—1–2 times a week.
  • Use drip irrigation to target roots, not leaves.
  • Apply water in the morning to avoid mildew.
  • Feel the soil—don’t water if it’s already moist.

Seasonal Maintenance in Shade Gardens Ideas

Staying on top of seasonal tasks keeps your garden healthy and productive year-round.

Spring:

  • Remove mulch
  • Add compost
  • Transplant or divide perennials

Summer:

  • Monitor moisture
  • Prune after flowering
  • Keep weeds in check

Fall:

  • Plant bulbs
  • Cut back spent growth
  • Add mulch for winter

Winter:

  • Prune dormant shrubs
  • Cover containers or bring them in
  • Reflect and plan improvements

Common Mistakes to Avoid in Shade Gardens Ideas

  • Using sun-loving plants in low light
  • Overwatering in cool, shaded soil
  • Skipping soil prep and organic matter
  • Planting too densely, reducing airflow
  • Ignoring the shade’s changing seasons

FAQs: About Shade Gardens Ideas

Q: Can vegetables grow in full shade?
A: Most edible plants need some sun. Leafy greens and herbs are your best bet in deep shade.

Q: Can I add color to a shade garden?
A: Yes! Use plants with colorful foliage like coleus and coral bells, and add shade-blooming flowers like impatiens or astilbe.

Q: What are the best low-maintenance plants for shade?
A: Hostas, hellebores, ferns, and native wildflowers are tough and require minimal care.


Final Thoughts: Shade Gardens Ideas

A well-designed shade garden can become the most peaceful, thriving corner of your landscape. Whether you’re growing organic herbs in containers, building native plant beds, or transforming a forgotten backyard corner, shade gardening opens up endless possibilities.

By working with nature—embracing shade instead of fighting it—you create a truly sustainable garden that benefits pollinators, protects soil, and brings calm beauty to your outdoor space.

So get started. Dig deep. Choose wisely. And let your organic shade garden ideas bloom

July 19, 2025 0 comments
1 FacebookTwitterPinterestThreadsBlueskyEmail
Newer Posts
Older Posts

Follow Us:


Organic Gardening

Organic Gardening

Welcome to Organic Gardening we are committed to helping you cultivate a thriving garden using nature’s most trusted methods.

Keep in touch

Facebook Twitter Instagram Email

Recent Posts

  • Parable of Sowing Seeds

  • Seed Sowing Equipment

  • Sowing Seeds

  • Spinach Plant Spacing

  • Zucchini Plant Spacing

Newsletter

Subscribe my Newsletter for new blog posts, tips & new photos. Let's stay updated!

Categories

  • Gardening (121)
  • Gardens (2)
  • Facebook
  • Twitter
  • Instagram
  • Email

@2025 All Right Reserved. Designed and Developed by Organi Gardening


Back To Top
organigardening.com
  • Home
  • Gardening
  • About Us
  • Contact Us