
Microgreens Seedlings
What Are Microgreens Seedlings?
Microgreens seedlings are the early, edible stage of vegetable and herb plants—typically harvested just after the first set of leaves, called cotyledons, have fully developed and before the true leaves appear. These tiny greens pack a powerful punch of nutrients, flavor, and beauty.
Often confused with sprouts, microgreens differ in key ways. While sprouts are grown in water and eaten whole (including the seed and root), microgreens are grown in soil or a growing medium and harvested above the root line. This distinction makes microgreens safer, more flavorful, and more versatile in culinary use.
Microgreens seedlings have taken off in popularity across the USA due to their fast-growing nature, high nutritional content, and minimal space requirements. Whether you’re gardening in a New York apartment or a California homestead, they’re one of the most rewarding crops you can grow.
Why Every Organic Gardener Should Grow Microgreens Seedlings
Nutrient-Dense Superfoods
Scientific studies reveal that many microgreens—like broccoli, kale, and red cabbage—contain far higher levels of vitamins C, E, K, and beta-carotene than their mature counterparts. For example, broccoli microgreens seedlings can contain up to 40 times the sulforaphane of mature broccoli, a compound known for cancer-fighting benefits.
Fast and Fun
In as little as 7 days, you can sow, grow, and harvest your microgreens. Their rapid lifecycle makes them perfect for beginner gardeners, students, and anyone seeking immediate gratification in organic gardening.
Compact and Space-Efficient
Forget needing a huge backyard—microgreens seedlings thrive in small trays, on kitchen countertops, or in window sills. Many urban gardeners grow microgreens in vertical shelving systems indoors, maximizing small living spaces.
Ideal for Organic Methods
Because microgreens grow fast and indoors, there’s no need for pesticides or herbicides. You can easily use organic soil, compostable trays, and natural watering methods, making this a truly sustainable way to grow your own food.

Understanding the Life Cycle of Microgreens Seedlings
Germination Stage
This is when the seed absorbs water and begins to sprout. Some varieties, like sunflower and pea microgreens, benefit from soaking for 8–12 hours to speed up germination.
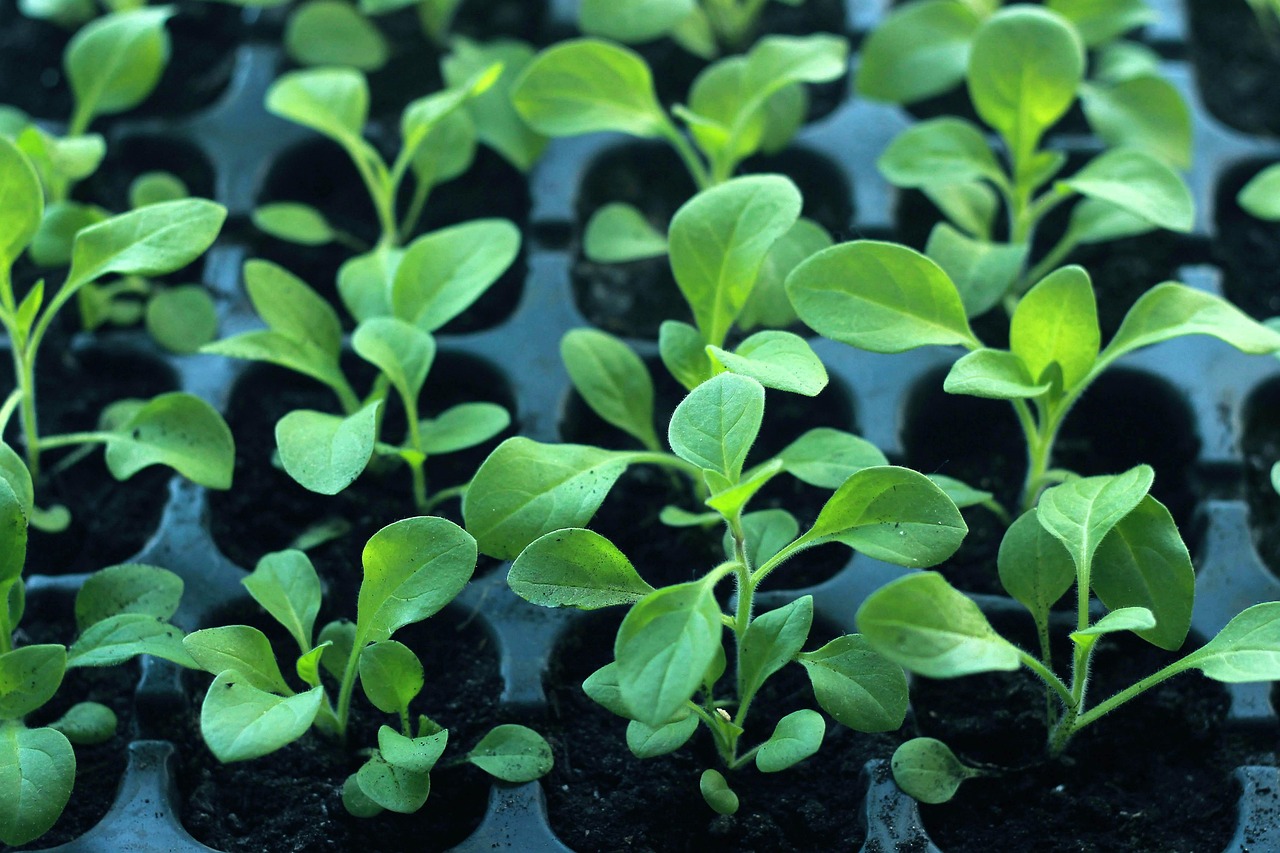
Microgreens Seedlings Stage
Once the seed sprouts, it sends up cotyledons—those tiny leaf-like structures that are rich in nutrients and ready for harvest in most microgreens.
Harvest Window
Between 7 to 14 days after sowing (depending on variety), microgreens are typically ready to harvest. Look for healthy, firm stems, and bright green leaves.
Choosing the Right Microgreens Seedlings Varieties for Seedling Growth
Easy Varieties for First-Time Gardeners
- Radish Microgreens – Spicy, fast-growing, and easy to manage.
- Sunflower Microgreens – Crunchy texture and mild nutty flavor.
- Pea Shoots – Sweet taste and excellent yield.
- Broccoli Microgreens – Mild and packed with antioxidants.
Gourmet Microgreens Seedlings for Culinary Use
- Cilantro Microgreens – Bold and aromatic, perfect for tacos and curries.
- Basil Microgreens – Sweet and savory, great on pizza or in pesto.
- Mustard Microgreens – Spicy kick and beautiful red-green foliage.
Seed Selection Tips
Always choose certified organic, untreated microgreens seeds. Many seed companies in the USA offer specialized seed blends for microgreens growing, ensuring better germination and food safety.
Equipment and Supplies for Growing Microgreens Seedlings
Growing microgreens doesn’t require fancy tools. Here’s what most USA home gardeners use:
- Microgreens seedling trays (flat, with or without holes)
- Organic seed starting mix or alternatives like coconut coir
- Filtered water spray bottle
- Grow lights or a sunny windowsill
- Humidity dome or blackout cover
- Organic microgreens seeds
Beginners may also consider purchasing a microgreens growing kit, which often includes trays, soil, and pre-measured seed packs.
Step-by-Step Guide to Growing Microgreens Seedlings
1. Prepare Your Seeds
If you’re growing larger seeds (like sunflower or peas), soak them overnight. This step encourages uniform sprouting and cuts down the microgreens germination time.
2. Fill the Tray
Fill a shallow tray with 1–2 inches of moist growing medium. Gently flatten it with your hand to create an even surface.
3. Sow Your Seeds
Sprinkle seeds evenly across the soil’s surface. For smaller seeds (like broccoli), a seed shaker can help distribute them uniformly. Press them gently into the soil but don’t bury them.
4. Cover and Rest
Cover the tray with another tray (upside down) or a blackout dome. This simulates darkness and encourages strong root anchoring.
5. Watering and Monitoring
Use a spray bottle to mist the seeds 1–2 times daily. Once sprouted, switch to bottom watering by placing the tray in a shallow reservoir.
6. Expose to Light
Once seeds have germinated, remove the cover and place them under a full-spectrum LED grow light or in a sunny location for at least 10–12 hours daily.
7. Harvesting
Most microgreens are ready in 7–14 days. Cut them just above the soil line using sanitized scissors or a sharp blade.

Daily Care and Maintenance Tips Microgreens Seedlings
- Rotate trays daily if using window light to ensure even growth.
- Monitor moisture levels carefully—too dry, and seedlings wilt; too wet, and you risk mold.
- Avoid overcrowding, which can lead to leggy seedlings and poor airflow.
- Use organic cinnamon or a light mist of chamomile tea to prevent fungal growth naturally.
Common Problems with Microgreens Seedlings
Mold or Mildew
Often caused by poor airflow or excess humidity. Improve ventilation or use a small fan. Avoid overhead watering.
Leggy Growth
Seedlings that stretch too tall and fall over are receiving insufficient light. Use a stronger grow light or decrease the distance.
Patchy Germination
May be due to uneven moisture or poor seed quality. Always soak large seeds and use a fine mist during early growth.
Yellow Leaves
Often a result of low light exposure or nutrient deficiency. Increase light hours and ensure the seed starting mix is balanced.
Harvesting, Storage, and Delicious Uses for Microgreens Seedlings
Harvest Tips
- Always use clean scissors.
- Harvest in the morning when leaves are plump and hydrated.
- Avoid disturbing roots when cutting.
Storage
- Store harvested microgreens in the fridge in breathable containers.
- Place a paper towel inside the container to absorb moisture and prolong freshness.
Culinary Uses
- Salads and wraps
- Smoothies and juices
- Soups and stews
- Garnishes for entrées
- Herbal teas (basil, fennel, and pea shoots)
Year-Round Indoor Growing in the USA
Winter
Use LED grow lights and maintain indoor temperature above 65°F. Heat mats help in colder climates.
Summer
Move trays away from direct afternoon sun to avoid overheating. Water more frequently due to evaporation.
Apartment Gardening
Use shelves or racks near bright windows. Many urban gardeners grow microgreens in compact kitchens, balconies, or patios.
Organic Gardening with Microgreens Seedlings
Compostable Trays and Soil
Choose biodegradable trays made from paper, hemp, or bamboo. Compost spent soil and root mats for reuse.
Organic Fertilizer
While most microgreens don’t require fertilizer, a diluted solution of liquid seaweed or fish emulsion can help longer-growing varieties.
Microgreens Seedlings Business Basics
Selling Locally
Join community markets or offer microgreens subscription boxes in your neighborhood.
Packaging
Use clear compostable containers and eco-labels. Presentation matters!
Food Safety
Sanitize trays between uses. Wash hands before harvesting. Follow USA cottage food regulations for your state.

Educational and Wellness Benefits Microgreens Seedlings
Teaching Children
Growing microgreens is a great way to teach kids about plant life cycles, healthy eating, and responsibility.
Therapeutic Gardening
Many people find the daily care of seedlings soothing. Watching growth from seed to harvest is deeply satisfying.
(FAQ): Microgreens Seedlings
Q1. Are microgreens the same as sprouts?
A: No, microgreens grow in soil or a medium and are harvested after the cotyledon stage. Sprouts are eaten root and all and grown in water.
Q2. Can I reuse microgreens soil?
A: It’s best to compost used soil and start fresh to prevent disease.
Q3. Do I need fertilizer for microgreens seedlings?
A: Usually not. The seed contains all the nutrients needed for the first 10–14 days of growth.
Q4. How do I prevent mold in my trays?
A: Ensure good airflow, avoid overwatering, and use clean trays.
Q5. What are the best microgreens for beginners?
A: Radish, sunflower, and broccoli microgreens are easy and quick-growing options.
Final Thoughts: Microgreens Seedlings
Growing microgreens seedlings is more than a hobby—it’s a lifestyle that aligns with healthy living, sustainability, and self-reliance. Whether you’re in a downtown loft or a rural farmhouse, you can grow your own nutrient-rich greens with minimal effort. It’s time to turn your windowsill into a micro-farm and enjoy the taste of your own harvest every week.