
How to Grow Microgreens
Introduction
Have you ever wanted to grow your own nutrient-packed greens right on your kitchen counter? Microgreens are an easy, fast, and fun way to dive into organic gardening, even if you’re short on space or experience. In this guide, we’ll show you how to grow microgreens at home, step by step — using sustainable methods, organic practices, and a touch of gardening magic.
Whether you’re a beginner or just want to expand your indoor garden, this guide is tailored to help USA-based home gardeners grow fresh, flavorful microgreens year-round.
What Are Microgreens?
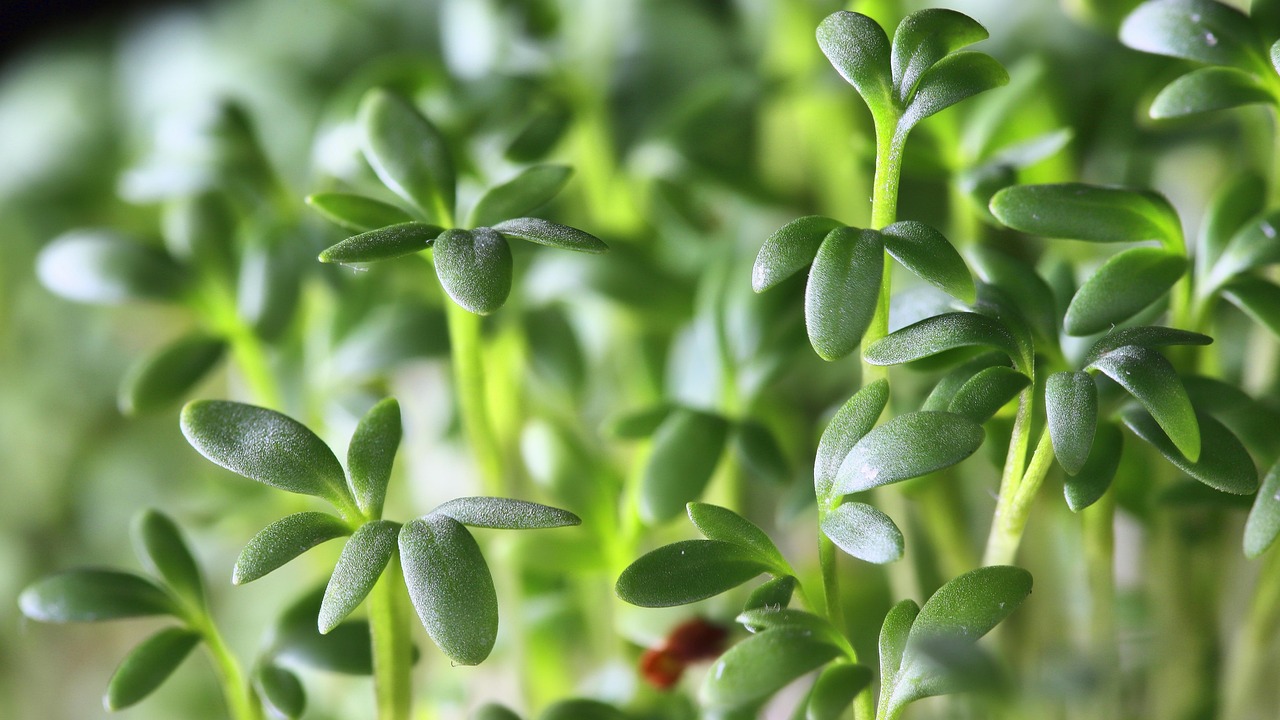
Microgreens are young, edible plants harvested just after the first true leaves develop. They’re not sprouts, and they’re not baby greens — they’re somewhere in between.
These tiny plants are grown from the seeds of herbs, vegetables, or grains and are typically harvested within 7 to 21 days of germination. Popular in gourmet kitchens and farmer’s markets, microgreens are now making their way into home gardens and kitchens across the USA.
Microgreens vs. Sprouts
While both are harvested early, sprouts are grown in water and harvested before leaves appear, whereas microgreens are grown in soil or a growing medium and harvested once the first true leaves emerge. Microgreens also have a stronger flavor and higher nutrient density.

Benefits of How To Grow Microgreens at Home
1. Nutrient-Dense and Healthy
Microgreens contain high concentrations of vitamins A, C, E, and K, along with antioxidants, minerals, and phytonutrients. Studies have shown they can have up to 40 times more nutrients than their mature counterparts.
2. Quick Turnaround
Unlike traditional gardening, where you wait months for a harvest, microgreens are ready in just 1–3 weeks. This makes them ideal for beginners or impatient gardeners.
3. Year-Round Indoor Gardening
You can grow microgreens indoors year-round, using grow lights or a sunny windowsill, regardless of outdoor weather conditions.
4. Low Cost, High Yield
With minimal space, tools, and time, you can produce several trays of microgreens each month for just a few dollars.
What You Need to Get Started How To Grow Microgreens
Basic Supplies
To grow microgreens, you’ll need:
- Organic microgreens seeds
- Shallow growing trays
- Growing medium (soil, coconut coir, or hydroponic pads)
- Spray bottle or misting can
- Grow light (optional but helpful)
- Scissors for harvesting
Optional:
- Heat mat (for germination in cooler climates)
- Humidity dome or tray lid
- pH-neutral water
Choosing the Right Microgreens Growing Kit
For beginners, a microgreens growing kit offers an all-in-one solution. These kits often include trays, seeds, soil, and instructions. Look for kits with non-GMO seeds and organic materials for the best results.
Step-by-Step Guide to How To Grow Microgreens
Step 1: Choose Your Seeds
Start with fast-growing, reliable varieties like:
- Radish microgreens
- Broccoli microgreens
- Sunflower microgreens
- Pea shoots
- Arugula microgreens
Step 2: Prepare the Tray and Medium
Fill your tray with about 1–1.5 inches of organic potting mix or soilless mix (like coconut coir or hemp mats). Lightly moisten the medium before seeding.
Step 3: Sow Seeds Evenly
Spread seeds evenly across the surface. Avoid overcrowding. Gently press them into the medium without burying them.
Step 4: Cover and Germinate
Cover the tray with another tray or a humidity dome to block out light. Place in a warm, dark place for 2–4 days until germination begins.
Step 5: Provide Light
Once you see tiny shoots, remove the cover and move the tray to a bright windowsill or under full-spectrum grow lights. Aim for 12–16 hours of light per day.
Step 6: Water Carefully
Use a spray bottle to mist daily, or bottom water by placing the tray in a shallow dish of water. Bottom watering prevents mold and stem rot.
Step 7: Harvest Time
Your microgreens are ready when they’re about 2–4 inches tall and have developed their first true leaves. Use clean scissors to cut just above the soil line.
How To Grow Microgreens Watering Techniques
Proper watering is critical for success.
Top Watering vs. Bottom Watering
- Top watering is fine in early stages, but can promote mold if overdone.
- Bottom watering (adding water beneath the tray) reduces surface moisture and keeps stems dry — ideal for indoor microgreens.
Avoiding Overwatering
Too much water creates soggy roots, leading to fungus gnats and damping off. Only water when the medium feels dry to the touch.
Best Lighting for How To Grow Microgreens
Natural Sunlight
If you have a south-facing window, that may provide enough light. However, cloudy days and winter light can reduce yield.
LED Grow Lights
Full-spectrum LED lights designed for plants are ideal. Position them 6–12 inches above the tray. Lights should be on 12–16 hours a day.
Fluorescent Lights
T5 fluorescent lights also work well but produce more heat.
How To Grow Microgreens Mediums for Microgreens
Soil-Based Mediums
Use organic potting mix, compost, or garden soil. Soil tends to produce the best flavor and size.
Soilless Mediums
- Coconut coir – sustainable, clean, and easy to handle
- Hemp mats – biodegradable and good moisture retention
- Vermiculite/perlite blends – lightweight and mold-resistant
Growing How To Grow Microgreens Without Soil
Hydroponic microgreens are grown on:
- Grow mats made of jute or bamboo fiber
- Coconut fiber pads
- Paper towels or burlap
These soilless systems are great for clean, compact spaces like apartments or offices.
Choosing the Right How To Grow Microgreens
Here are some top organic options for growing microgreens indoors:
Soilless mix – clean and mold-resistant
Organic potting mix – classic choice
Coconut coir – sustainable and clean
Vermiculite – good moisture retention
Common How To Grow Microgreens Problems
Mold or Fuzzy Growth
Often mistaken for roots. Mold smells bad and can kill plants.
Solutions:
- Use a fan for airflow
- Water from the bottom
- Don’t overcrowd seeds
Leggy Microgreens
Happens due to insufficient light.
Fix: Lower the light source and provide more intensity.
Yellow Leaves
Caused by lack of sunlight. Fix with full-spectrum grow lights.
How to Harvest Grow Microgreens Properly
Signs They’re Ready:
- 2–4 inches tall
- First true leaves visible
- Typically 7–21 days after planting
Harvest Tips:
- Use sharp, clean scissors
- Harvest in the morning for best flavor
- Don’t pull roots; just cut the greens
How to Store Grow Microgreens
After harvesting:
- Rinse and dry completely
- Store in airtight containers
- Refrigerate and use within 5–7 days
Pro tip: Use paper towels to absorb moisture in containers.
How to Use Grow Microgreens in Your Meals
Popular Uses:
- Toss into salads
- Blend into smoothies
- Top omelets, tacos, or avocado toast
- Garnish soups, pasta, or stir-fries
Microgreens like radish, mustard, or arugula offer spicy notes, while pea shoots and sunflower are sweet and crunchy.
Sustainability and Organic Gardening
Why Microgreens Are Eco-Friendly:
- Use minimal water
- No chemical fertilizers needed
- Compost-friendly waste
- Zero food miles when grown at home
Organic Practices for Microgreens:
- Use certified organic seeds
- Avoid synthetic sprays or fertilizers
- Use compostable trays and materials
Turning How To Grow Microgreens Into a Business
Many small gardeners have turned microgreens into a side hustle.
How to Start Selling Grow Microgreens:
- Sell to local restaurants
- Offer microgreens to farmers markets
- Package for subscription boxes or CSAs
Just ensure you meet your state’s food safety regulations.
Buying Seeds and Supplies in the USA
Top USA Seed Suppliers:
- Johnny’s Selected Seeds
- True Leaf Market
- Botanical Interests
- High Mowing Organic Seeds
Where to Buy Microgreens Kits:
- Amazon (check reviews)
- Etsy (handcrafted options)
- Local garden stores
Final Tips for How To Grow Microgreens Successfully
Don’t be afraid to experiment!
Keep a gardening journal to track germination times
Rotate your seed varieties for diversity
Use labels to identify trays
(FAQs):
How long do microgreens take to grow?
Most are ready in 7–14 days, depending on the variety.
Can I grow microgreens without sunlight?
Yes! Use grow lights for consistent indoor growth.
Are microgreens the same as sprouts?
No. Sprouts are grown in water and eaten with roots, while microgreens grow in medium and are harvested above the soil.
Are microgreens profitable?
Yes, especially for small-scale local growers. Many sell to restaurants, farmers markets, or direct-to-consumer boxes.
Conclusion: How To Grow Microgreens
If you’ve made it this far, congratulations — you now know exactly how to grow microgreens at home, using organic, sustainable, and easy methods that work for any lifestyle.
Whether you’re gardening on a balcony, in your kitchen, or a backyard greenhouse, microgreens offer quick wins, tasty rewards, and a big step toward healthy, eco-conscious living.